Running the Analysis
Once the user has completed the modelling process, the next step is to determine how secure the model is and whether any security gaps require additional security concerns.
Threat Analysis
Right-click either on the package or the diagram itself in the Project Browser and then select Specialize ➺ THREATGET➺ Threat Analysis. In our case, the package is called ThreatGet Example. Additionally, you can perform the threat analysis by selecting THREATGET➺ Threat Analysis from the Specialize ribbon.
Before initiating the threat analysis process, ThreatGet asks the user to select the tag(s) of rules that should be applied to the given model. Tag(s) are used to classify categories of rules as discussed in Managing Tags.
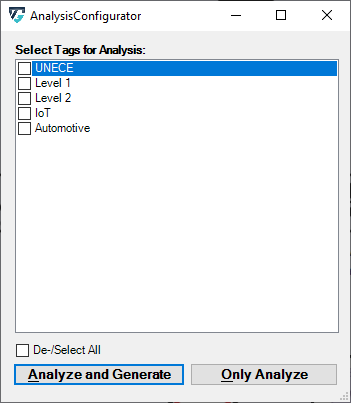
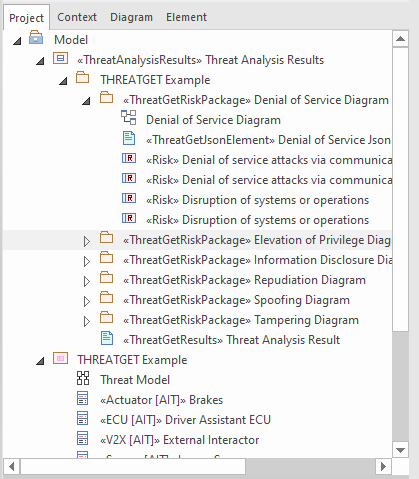
The Analyze and Generate button initiates the threat analysis process based on the selected tags. It then generates new packages based on the folder structure of the System Model as well as one diagram per package. This is to distinguish the detected threats by STRIDE category. Moreover, Risk Diagrams linking the threats with the affected elements, assets and connections are generated. Additionaly, a table containing the resulting threats is generated and automatically opened. if you want to reopen it at a later time, double-click on Threat Analysis Results.
The Only Analyze button initiates the threat analysis process based on the selected tags. For selection only the Results table will be generated without Risk Diagrams.
ThreatGet's UI
ThreatGet creates an interface that contains all identified potential threats and gives more information about each threat, such as its impact, likelihood, and severity level. In addition, for each threat, the interface presents a graphical representation of all affected elements to highlight the influence of a threat on the model's elements.
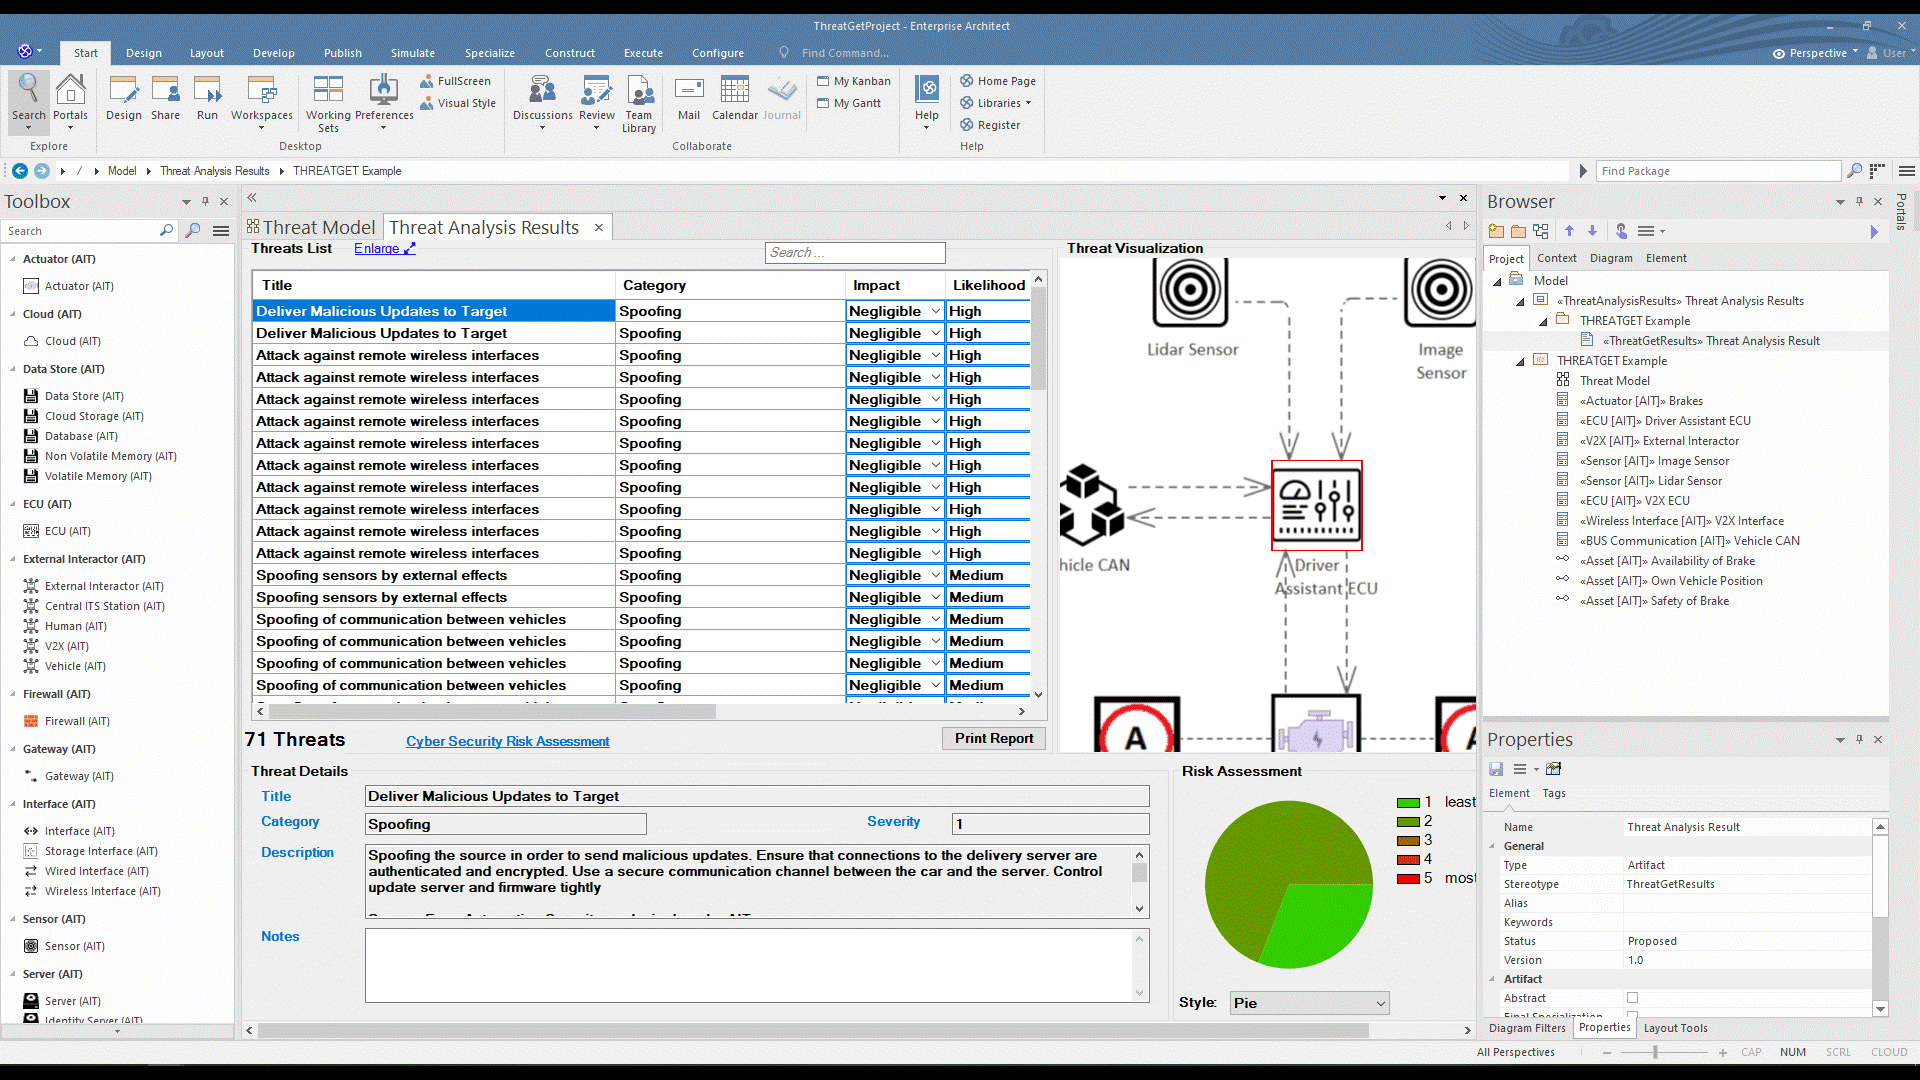
Scroll in the Threat List table to reveal Impact and Likelihood values. On the right side, there is a diagram illustrating the selected threat. If several elements are involved in a threat, they are all in the diagram. All related details for each identified threat can be viewed at the bottom section represented as Threat Details.
Threat Categories
Each Threat is categorized based on the STRIDE model:
- S – Spoofing of user identity
- T – Tampering
- R – Repudiation
- I – Information Disclosure
- D – Denial of Service
- E – Elevation of Privilege
Risk Matrix
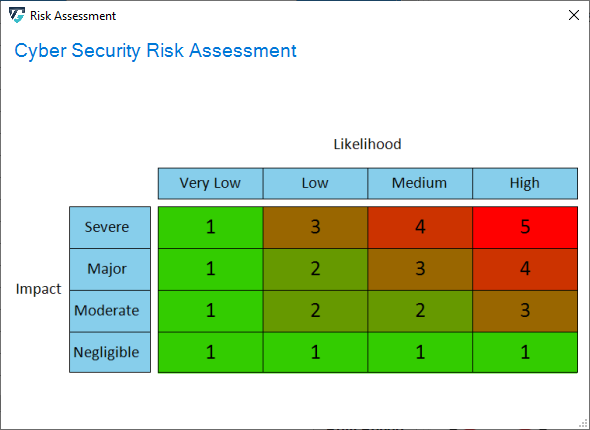
Additionally, each threat is annotated with two extra parameters: Impact and Likelihood. These parameters are used to determine the threat's risk severity level. Then, the overall risk level is estimated based on the previous calculation of each threat's severity individually. ThreatGet allows the user to customize risk levels of the risk evaluation process. These values can be modified on the ThreatGet server as discussed in Risk Matrix. Any changes on these parameter values on the server-side will be automatically reflected on ThreatGet's UI.
Furthermore, users can adjust these values for any threats listed in the UI by selecting newly adapted values from drop-down menus. The change immediately affects the severity level.
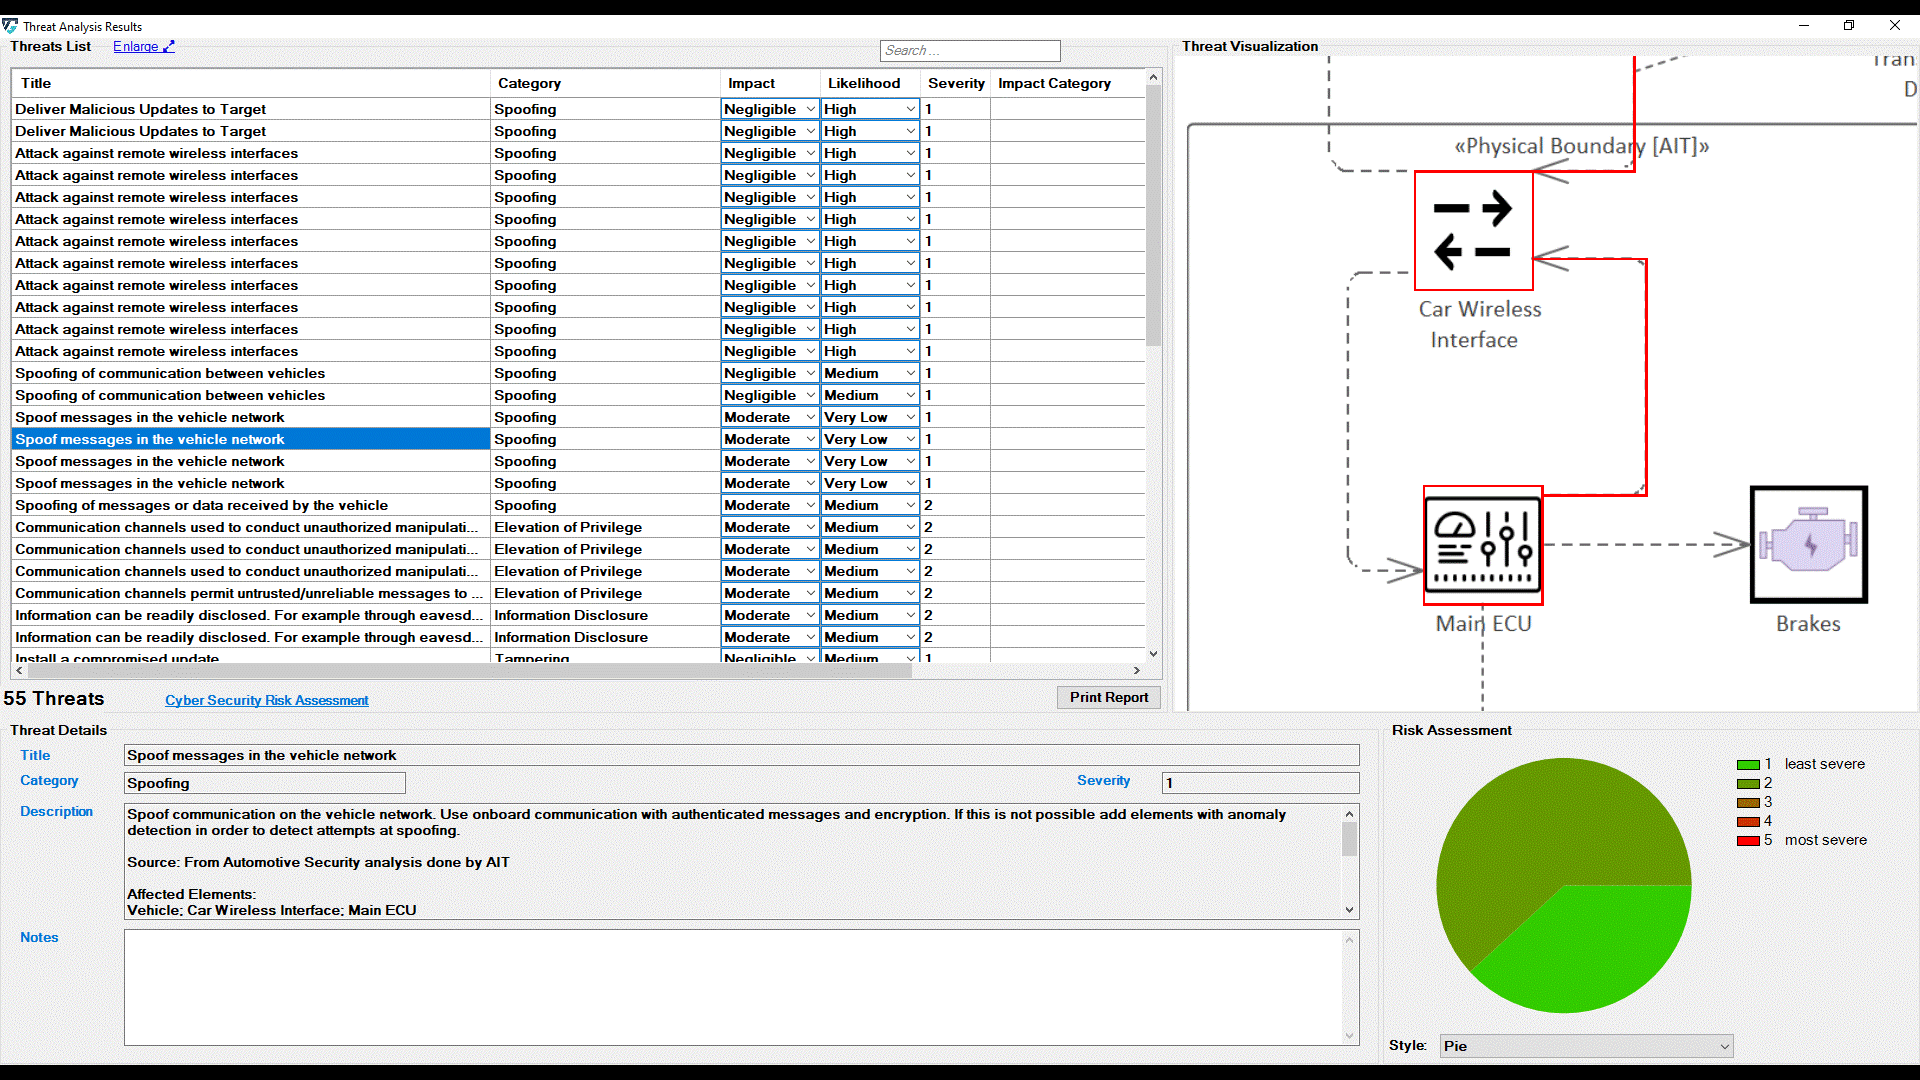
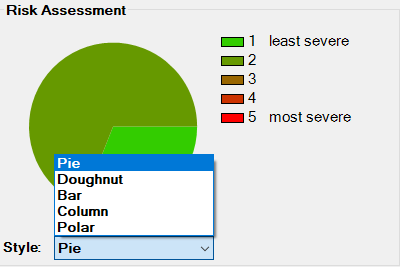
It further affects the chart on the bottom right side of the screen. Five chart styles are available for representing the distribution of threats based on the Severity of the Risk, as shown below.
Adding Notes
It is also possible to enter notes about the analysis. This makes it possible to save individual information for later use. This information is entered either in the field below the description or in the rightmost column of the analysis.
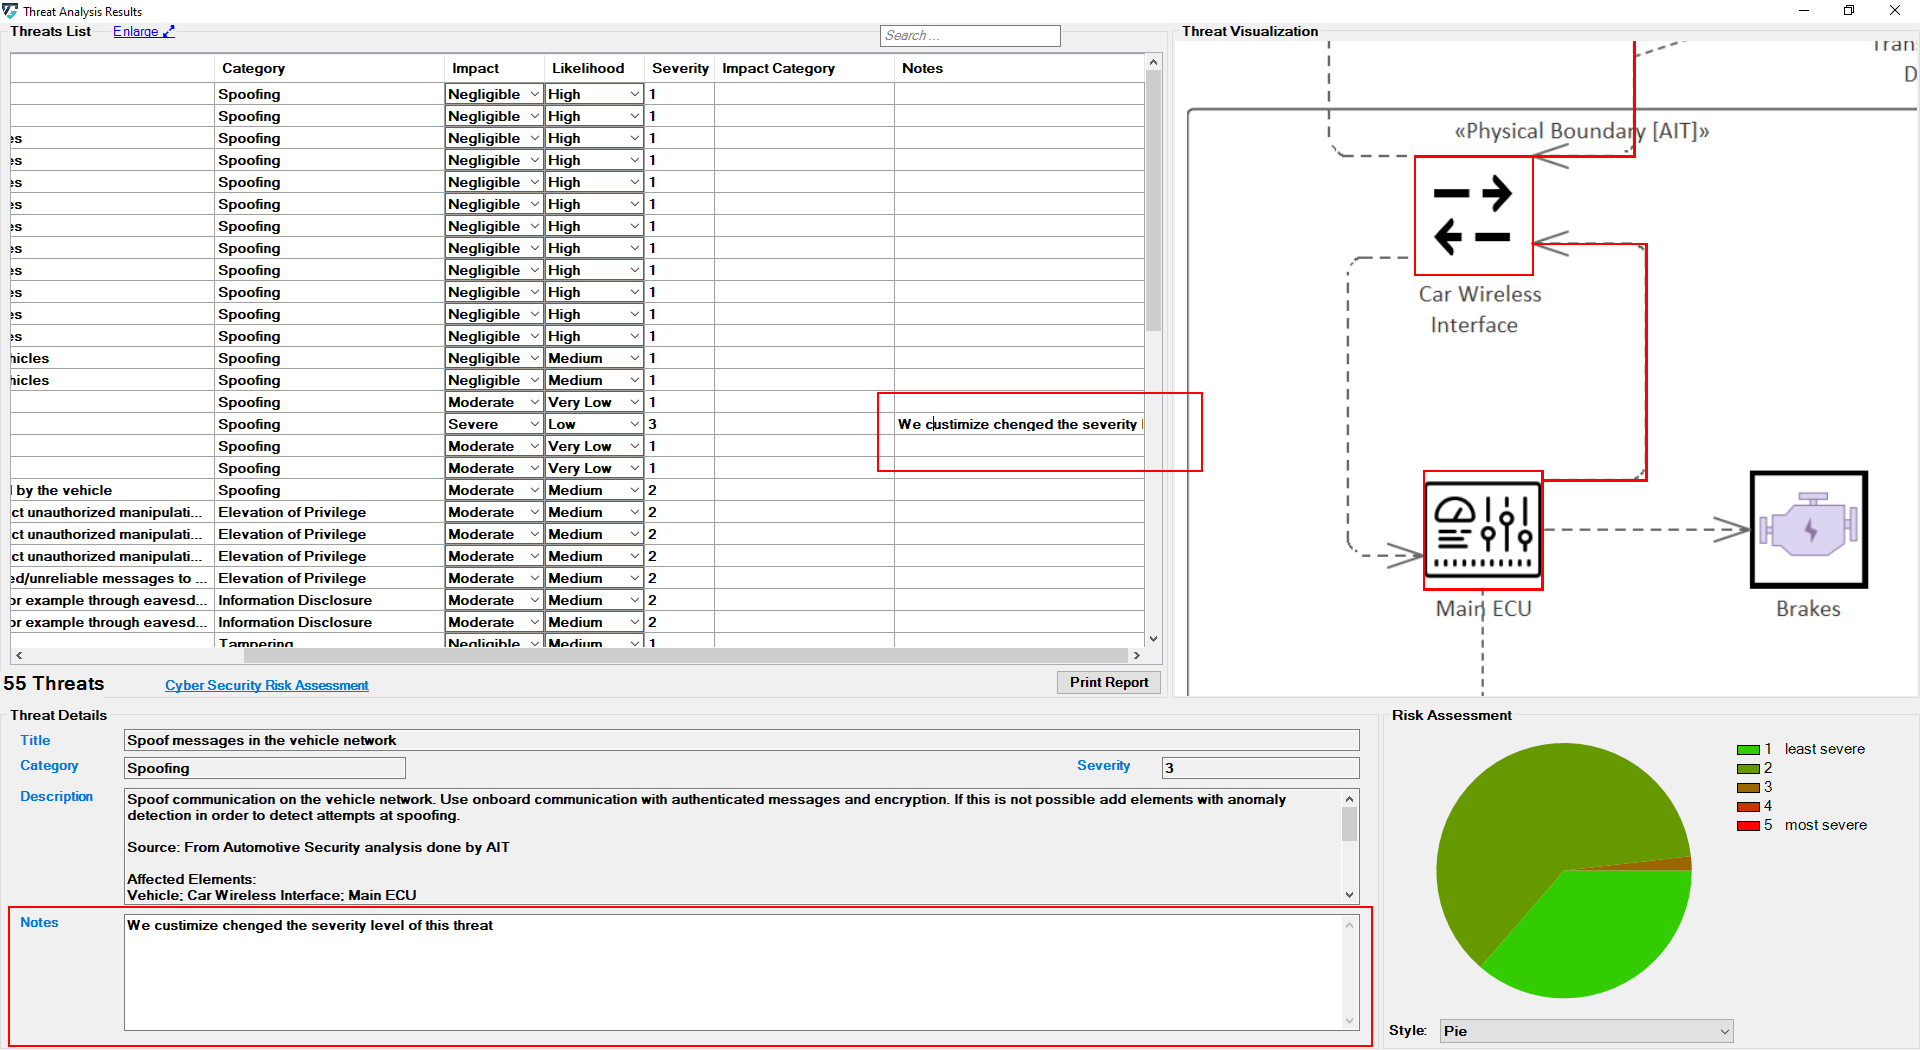
With each threat, the user can write comments in order to provide a more informative threat description; but only the first line of the user's note will be displayed at the note column in the table.
Find Data
You can also use the ThreatGet search function to search through outcomes easily. The user's input is then used to filter the threat table.
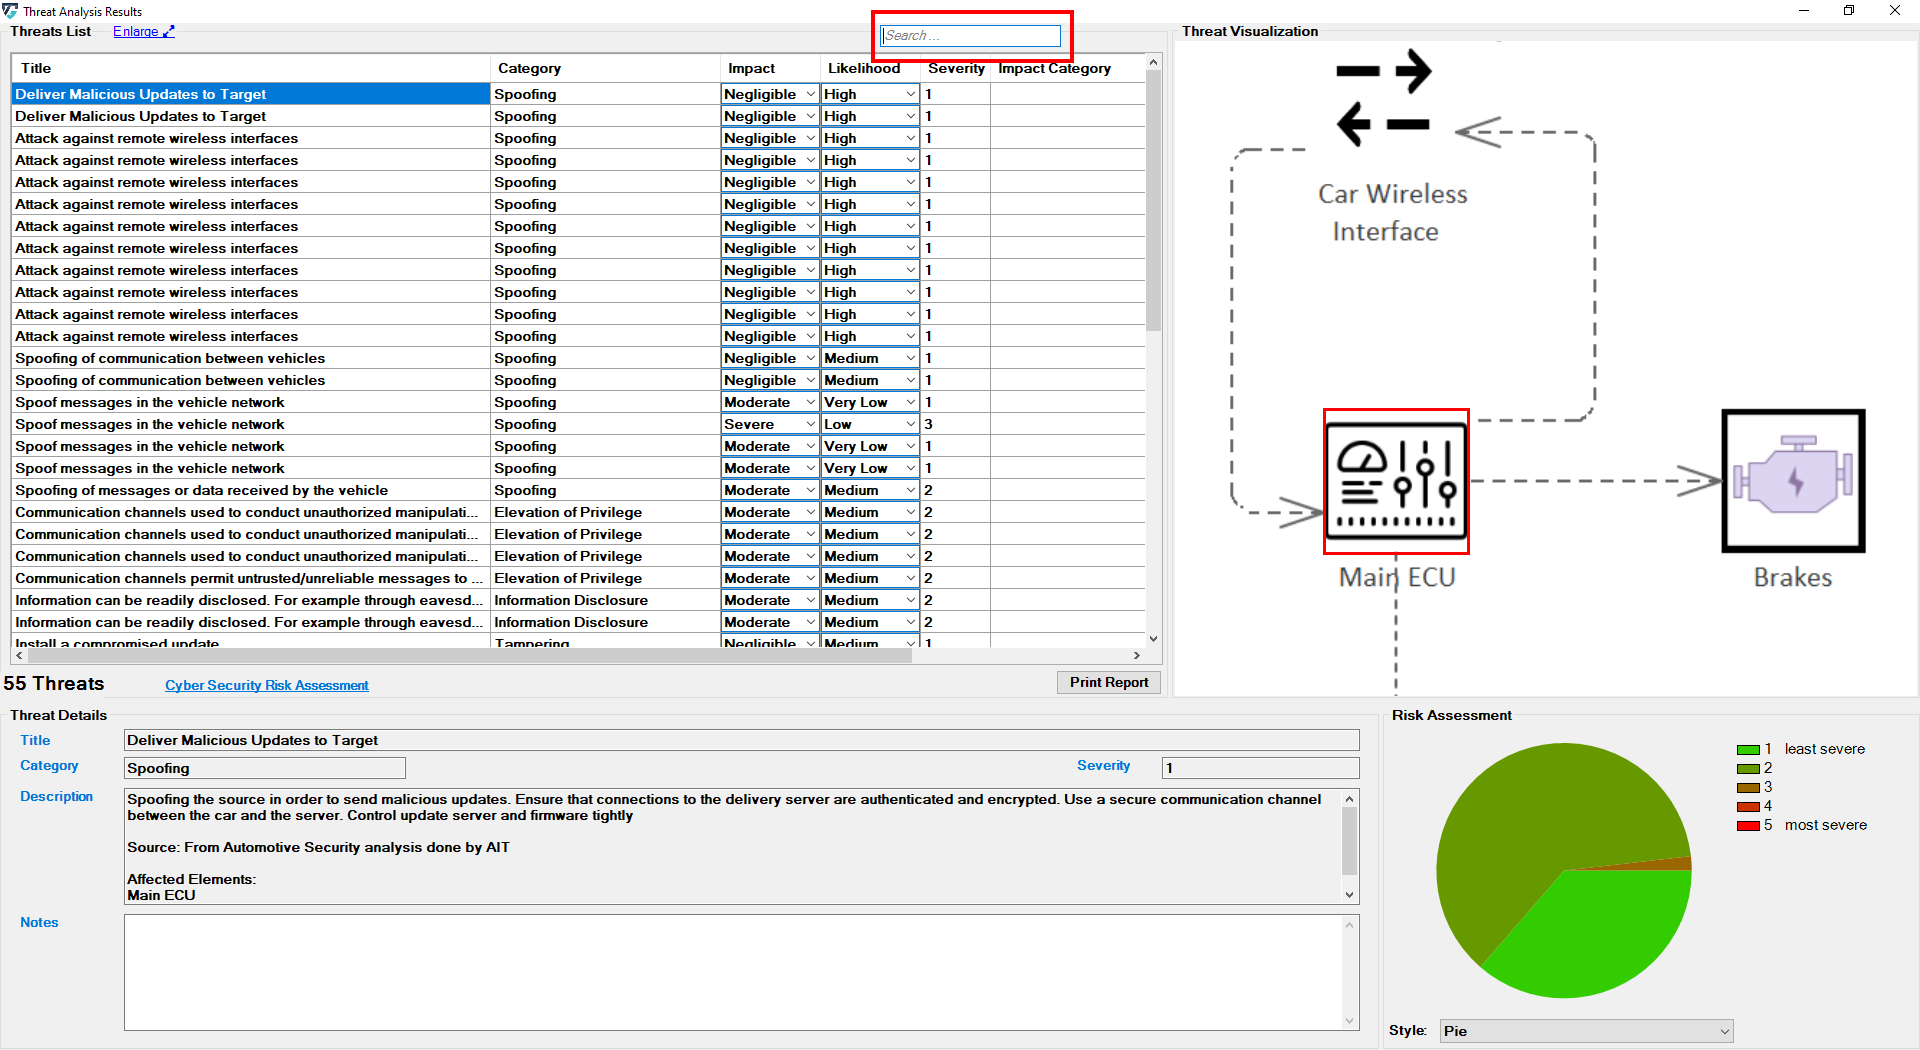
The searching function filters the obtained outcomes (i.e., title, category, impact, likelihood, description, and notes of each threat) based on the user's input.
For example, if you type "spoofing in the search bar, ThreatGet displays the threats that are classified as "spoofing" category.

Finally we can print a report of the generated threats.