Managing Elements
To use the THREATGET Analysis in Enterprise Architect, you have to use the THREATGET Toolbox to model the system.
This Toolbox provides your defined Elements, Connectors and Boundaries.
First of all we want to give you an overview of the differences between Elements, Connectors and Boundaries are.
Please consider the following system model example.
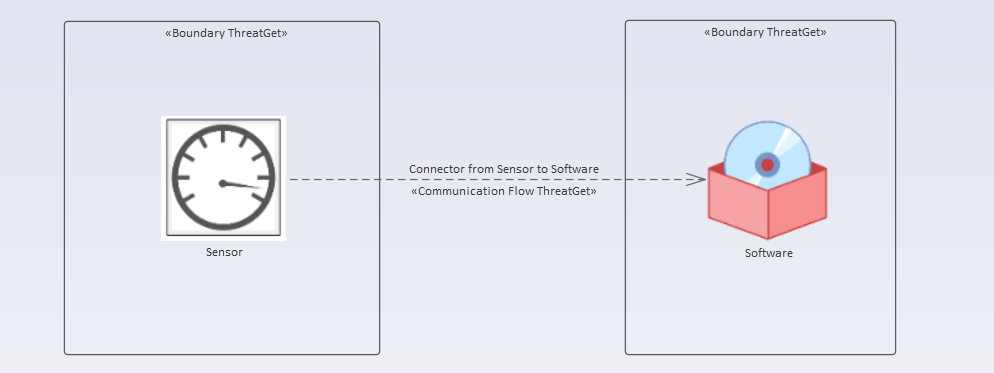
Inside the diagram the Sensor and the Software are Elements.
Elements inside the system model can be connected through a Connector. Inside the example it is the Communication Flow from the Sensor towards the Software. This Connector says that the Sensor sends data to the Software
In the general context, a connector describes a connection between two elements. This connection can be considered physical, as well as logical. For example, you want to check what kind of connection there is between two elements, wireless or wired. Or you want to investigate what kind of data is exchanged between these elements.
Boundaries can be seen as container for one or more Elements. They can also embody physical as well as logical aspects. As in the example, one could assume that the Sensor and Software act physically and logically separately from each other.
Elements, Connectors and Boundaries can be grouped into so-called hirarchies. Please see the following picture.
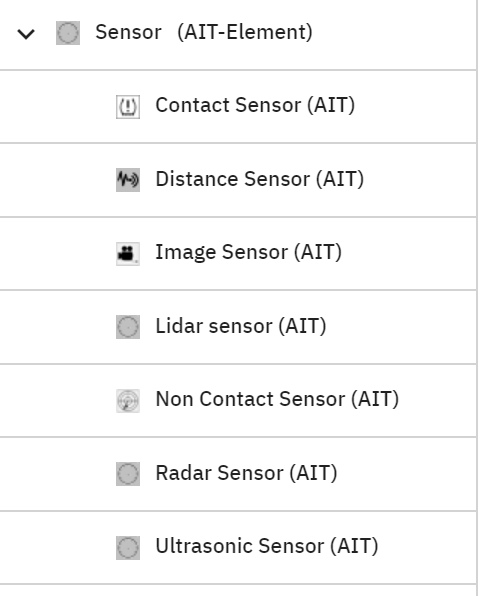
As you can see from this, there is a superordinate category Sensor and several subordinate types of sensors like the Contact Sensor.
The peculiarity is that the top category inherits its properties to the derivatives below. What this means will be shown later.
You can only change or delete Elements you have created yourself. The Elements provided by the AIT cannot be edited.
Next to the title of the element, you can see the namespace of it in parenthesis. Note: The Namespace is described in the Configuration/Namespace section.
Create an Element
To create a new Element, you first have to switch to the correct overview.
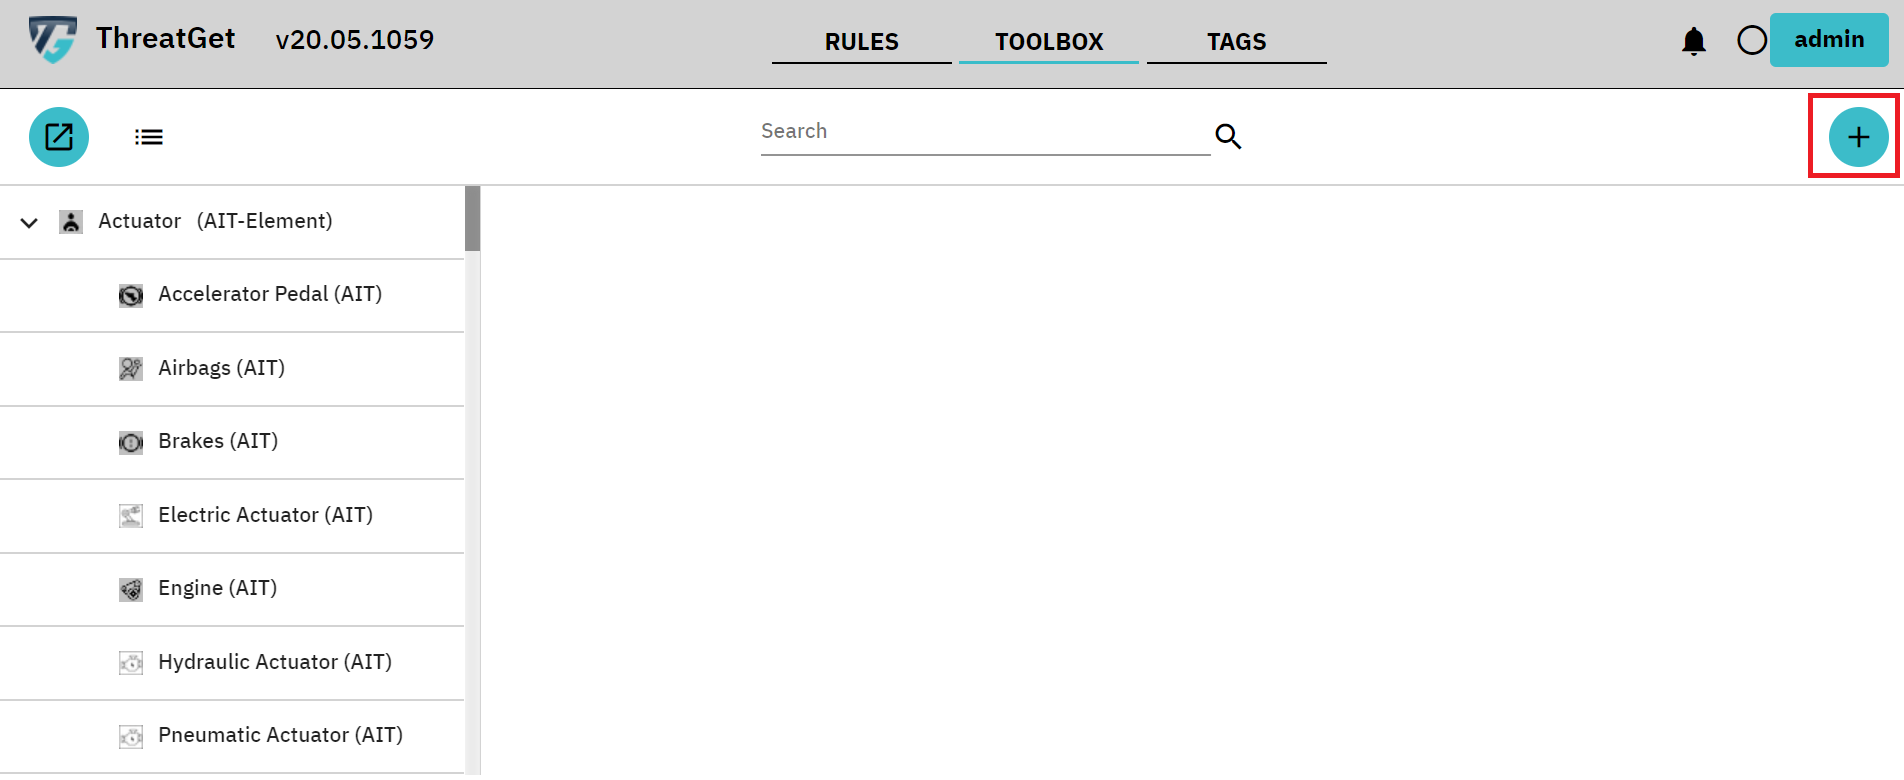
Please click on Elements in the Navigation bar. RED marked in the picture below.
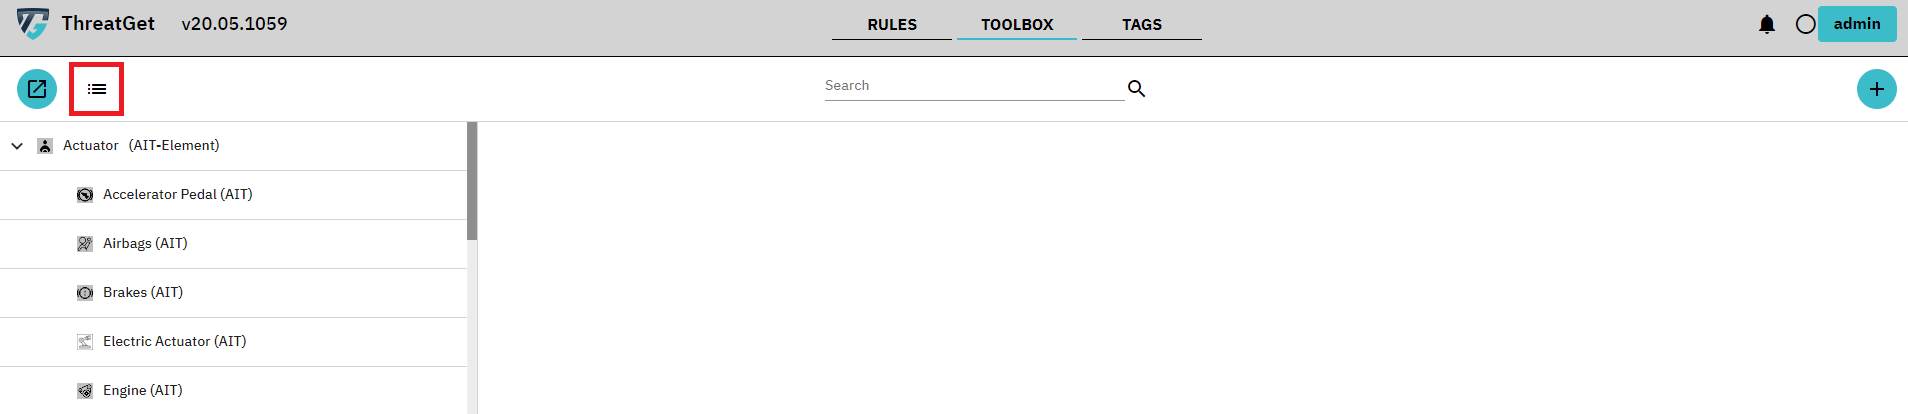
This opens the overview with the defined elements.
On the left side you can already see all defined Elements, Connectors and Boundaries in their hierarchical structure.
You can also click these to get more information.
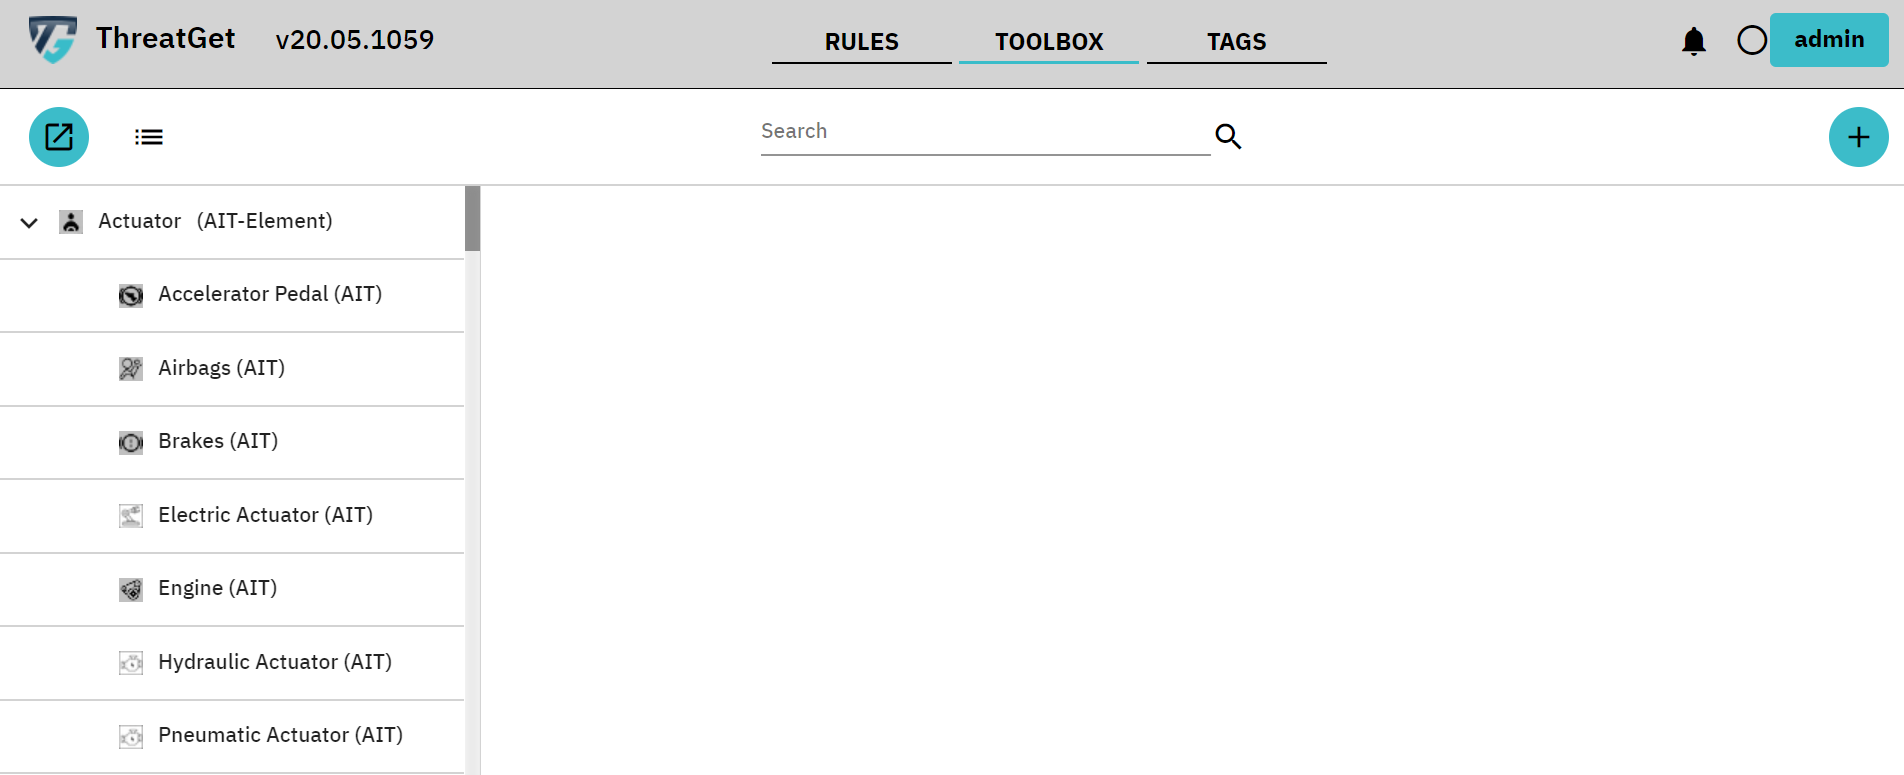
Now we want to create a new top-level element. Please click on the + in the upper right corner. RED marked in the picture below.
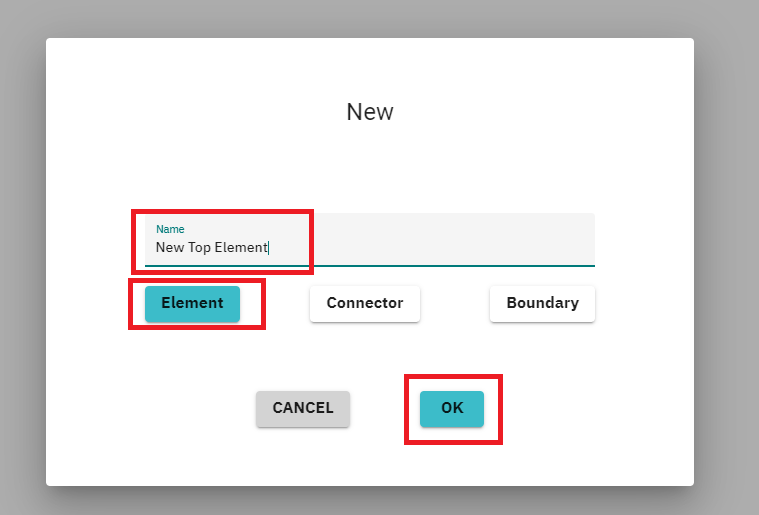
A dialog opens in which you can define a name and select the desired type. In this case, please click on Element and then on OK in the lower right corner.
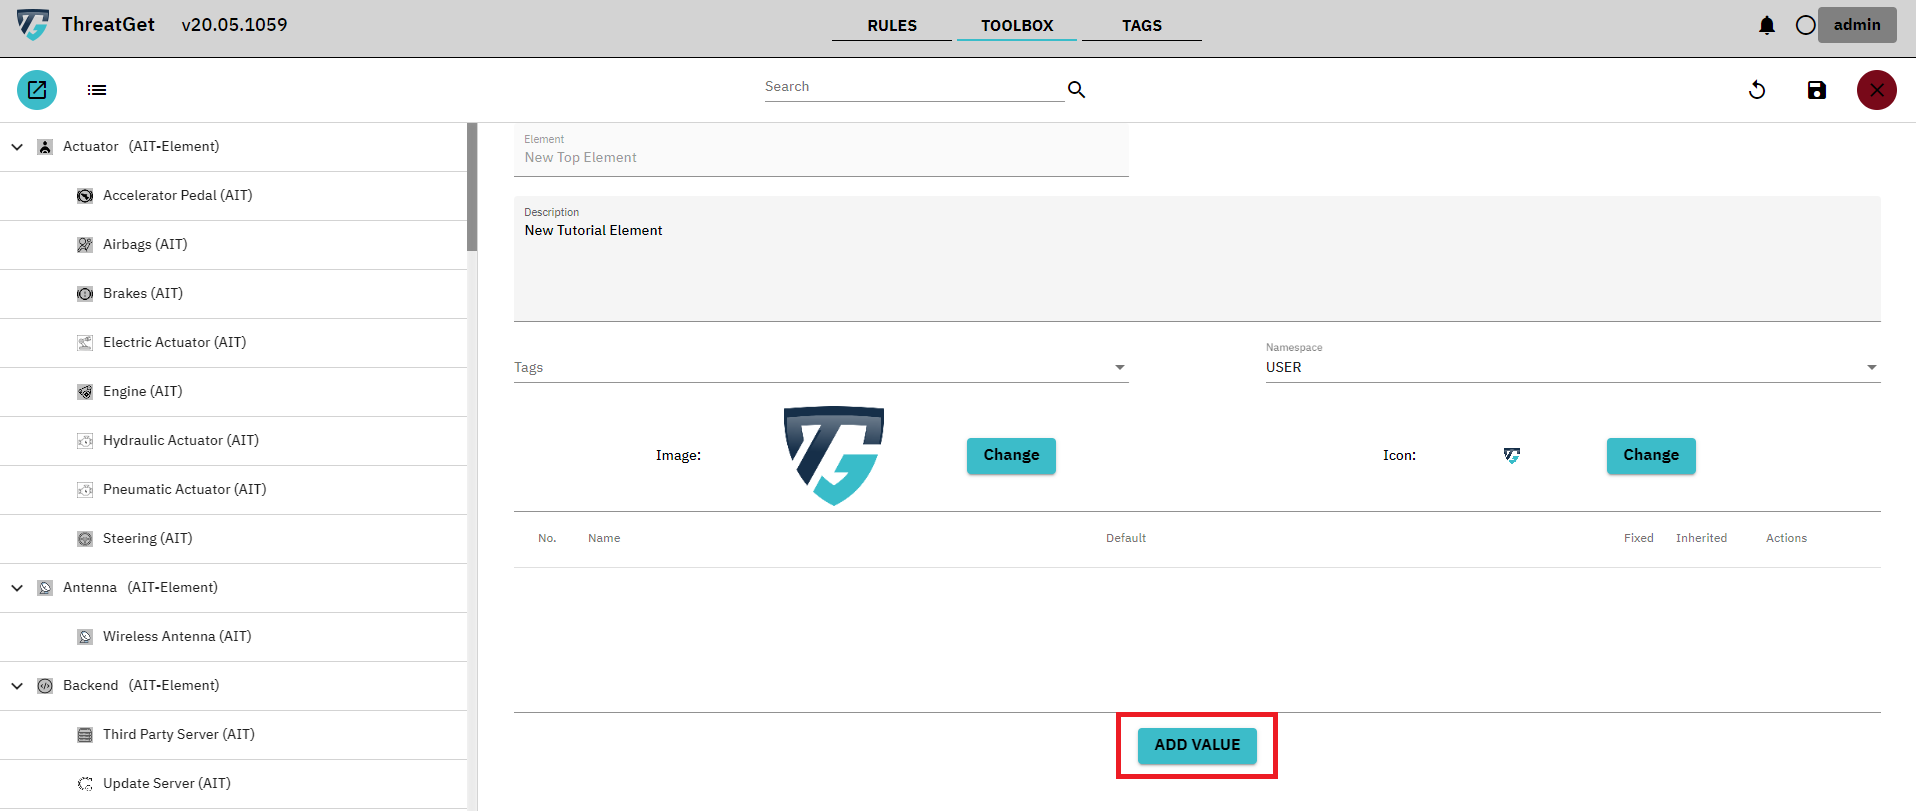
The following view is then presented to you.
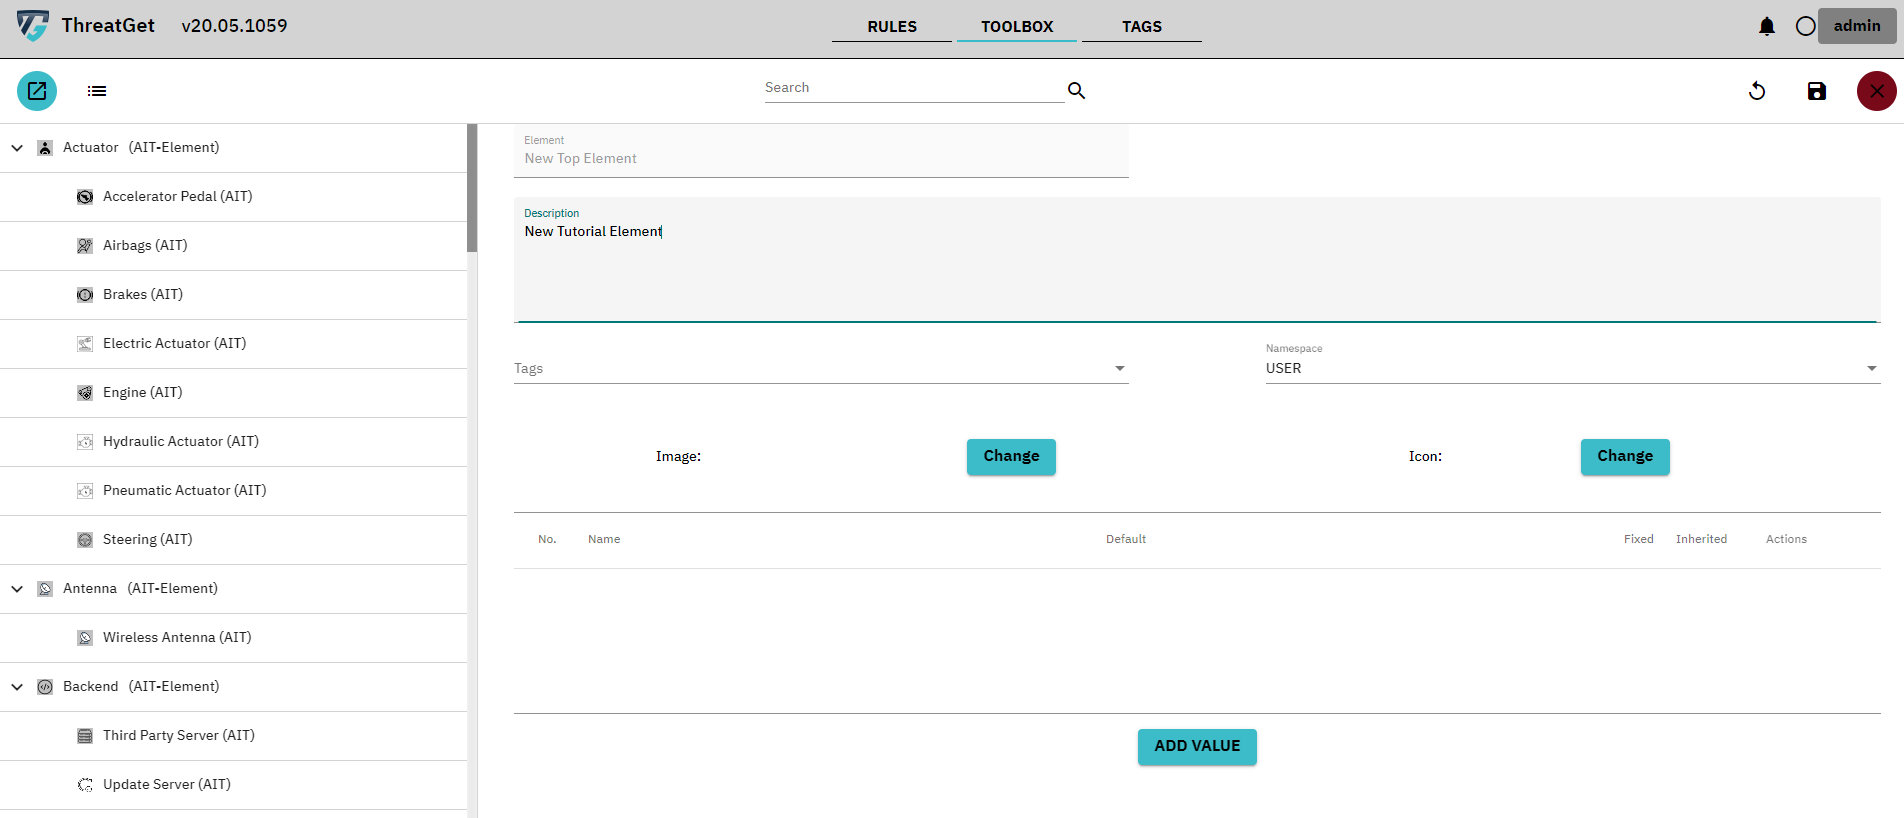
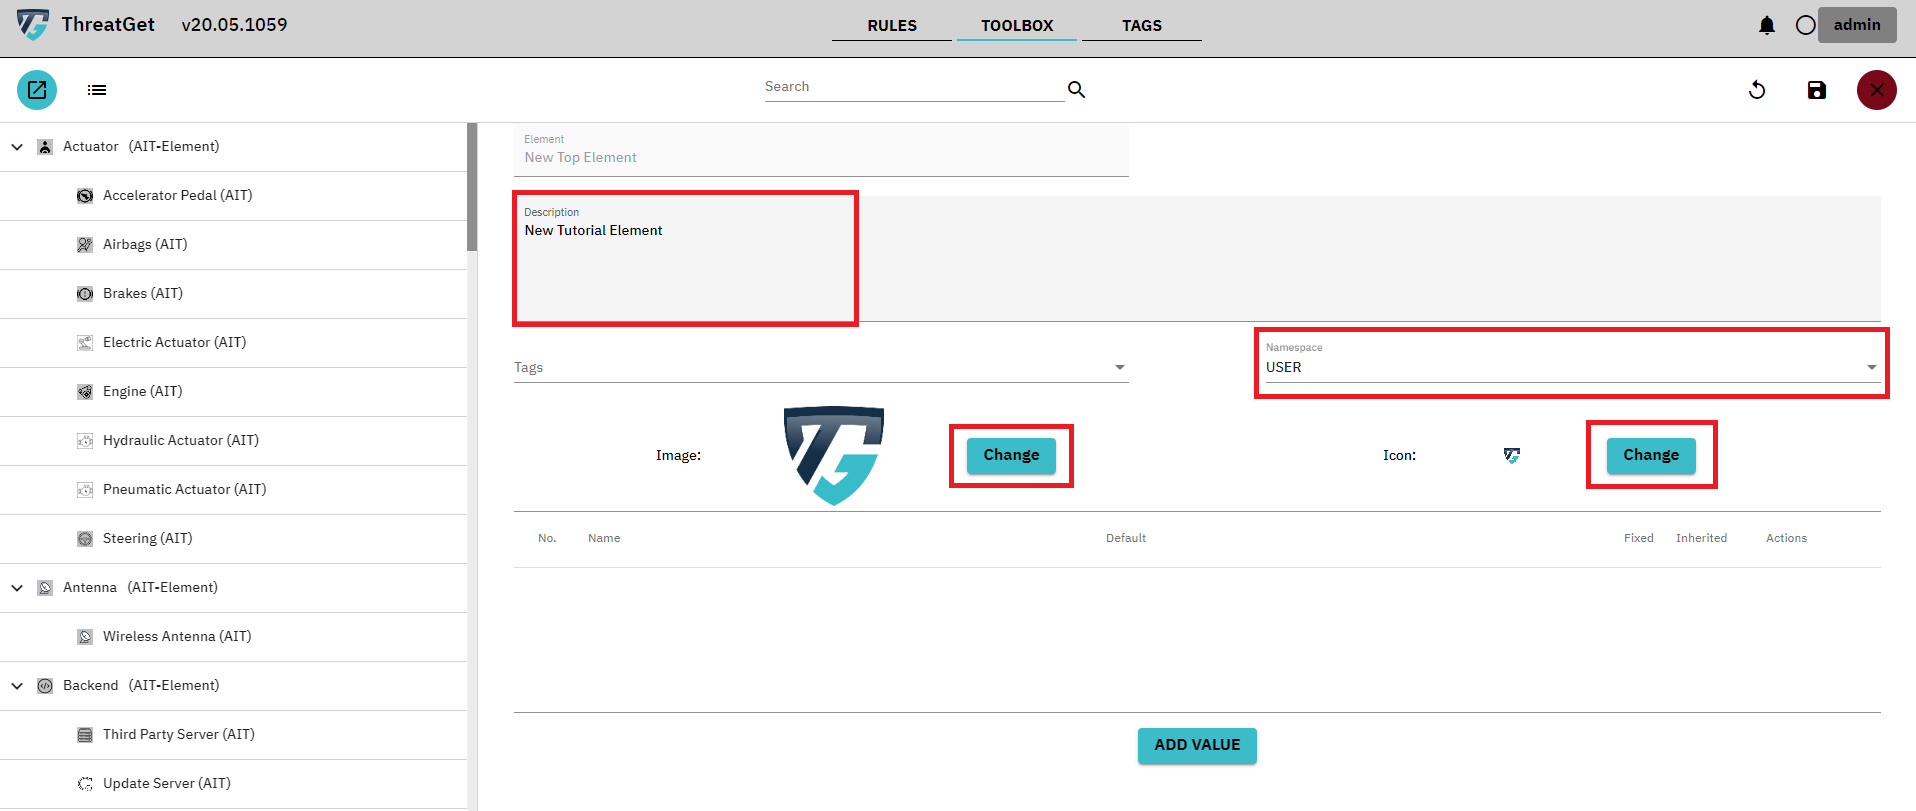
Here you can now enter a Description for the element. You are obliged to define an Icon as well as an Image for the element. To add the icon and image, please click on the Change button and select a desired image. Image size and resolution are automatically adjusted. Please Only use PNG images. You can also change the Namespace. All elements you create have the default namespace (in the standard installation called "USER"). You can however select a different namespace. The items created by AIT have the "AIT" namespace.
In the lower part of this view you can see a table in which there are currently still entries. This table shows the Tagged Values that have been assigned to this element. Tagged Values describe the properties of the elements. It is also possible to add several. To add one please click the ADD Value. RED marked in the picture below.
A dialog opens in which you can review and add the Tagged Values you want.
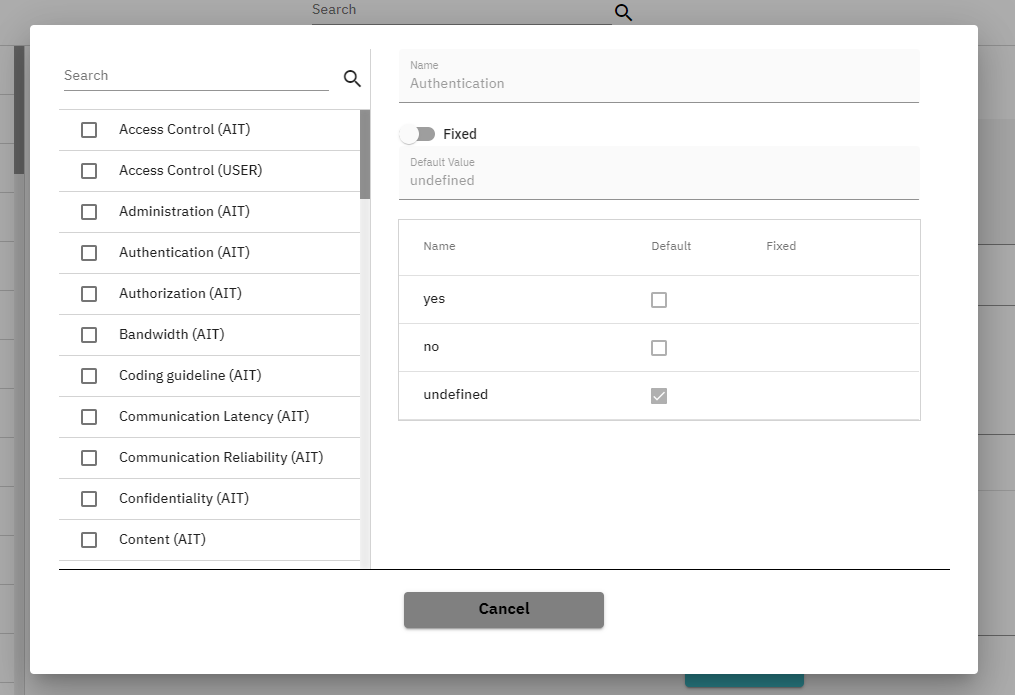
On the left side you can see all the TaggedValues that can be added to your new element.
If you click on one of these the details are displayed on the right side. Here you can review the Tagged Value and change the Fixed setting.
The Fixed setting says that the Default Value of the Tagged Value cannot be changed inside of the System Model.
If you click on the toggle button the Values table below changes. It adds a new column FIXED where you can adjust the fixed value for this Tagged Value for this specific element.
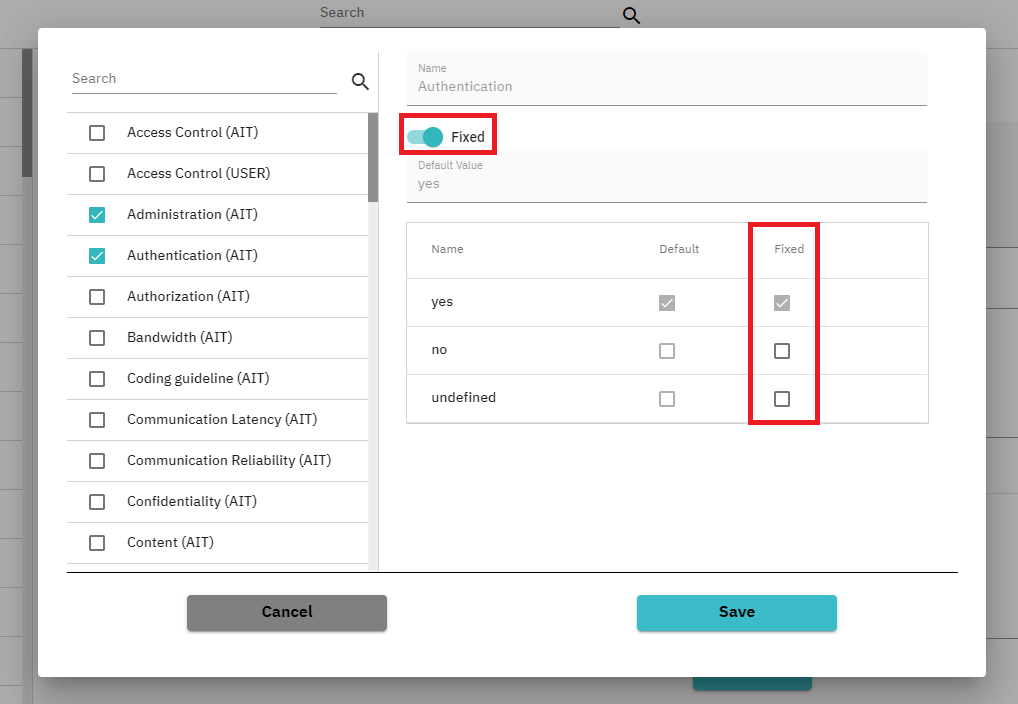
To add a Tagged Value you have to activate the Checkbox next to the name of the Tagged Value.
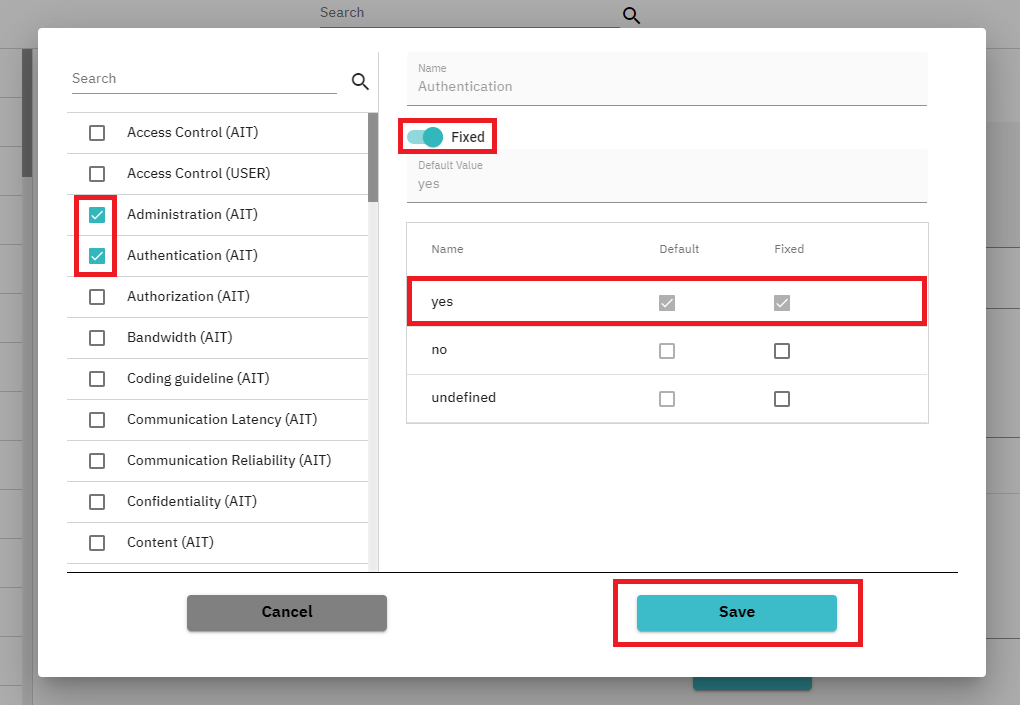
Please add now the Tagged Values Authentication and Authorization.
Then click on SAVE in the lower right corner.
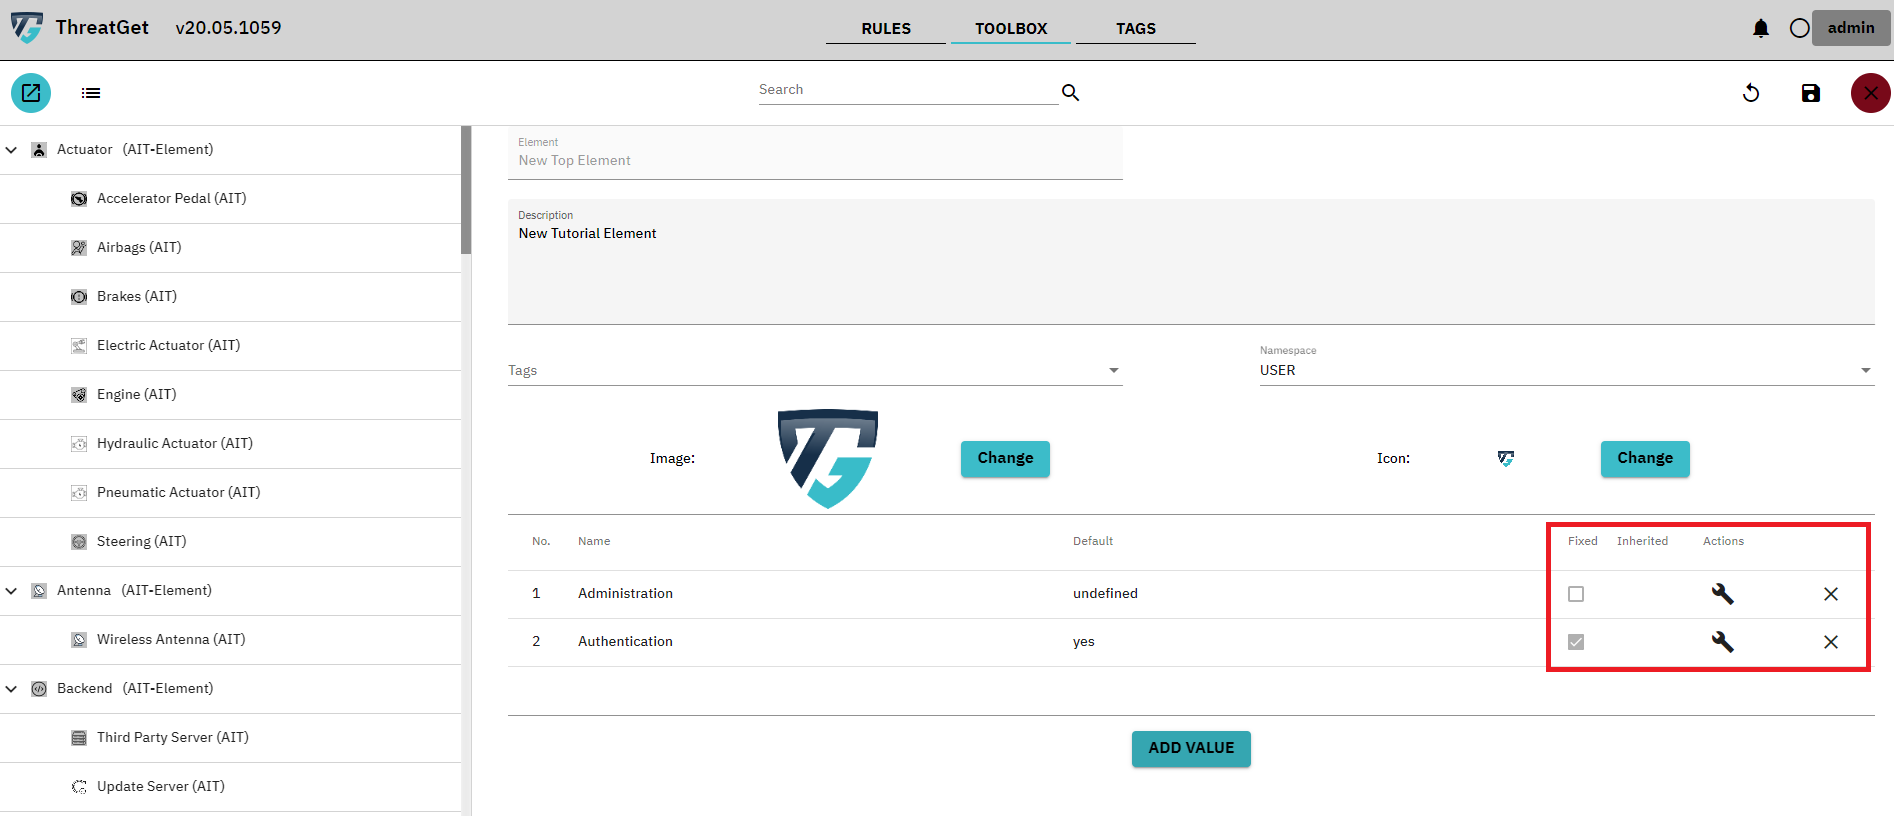
Now you can see that the selected Tagged Values Authentication and Authorization where added to the table below.
The difference here is that we changed the value of Authentication to the Fixed Value YES.
So if somebody uses this element inside of a system model the value of Authentication is always set to YES and cannot be changed.
The Column Inherited shows if a Tagged Value was inherited from the top of the hirarchie. This is not possible in this case because we created a new Category. But we will see this if we create a Sub-Element.
By clicking the EYE inside the Actions column the Tagged Value can reviewed again.
By clicking the WRENCH inside the Actions column the Tagged Value can adjusted according to its default or fixed value.
By clicking the CROSS inside the Actions column the Tagged Value can deleted from the Element.
In the right upper corner you can see two buttons.
To cancel the creation of your new element you can click on the X with red background.

To save your newly defined tagged value, please click on the button with the floppy disk in the top right corner.

For now please save your new ELEMENT so we can create a Sub Element.
Create a Sub Element
After we created now our Top Element we will now create a Sub Element.
To find our new created element faster inside all the define elements you can use the Search Field directly below the Navbar.
Please enter a Substring of the elements name or description and then hit ENTER.
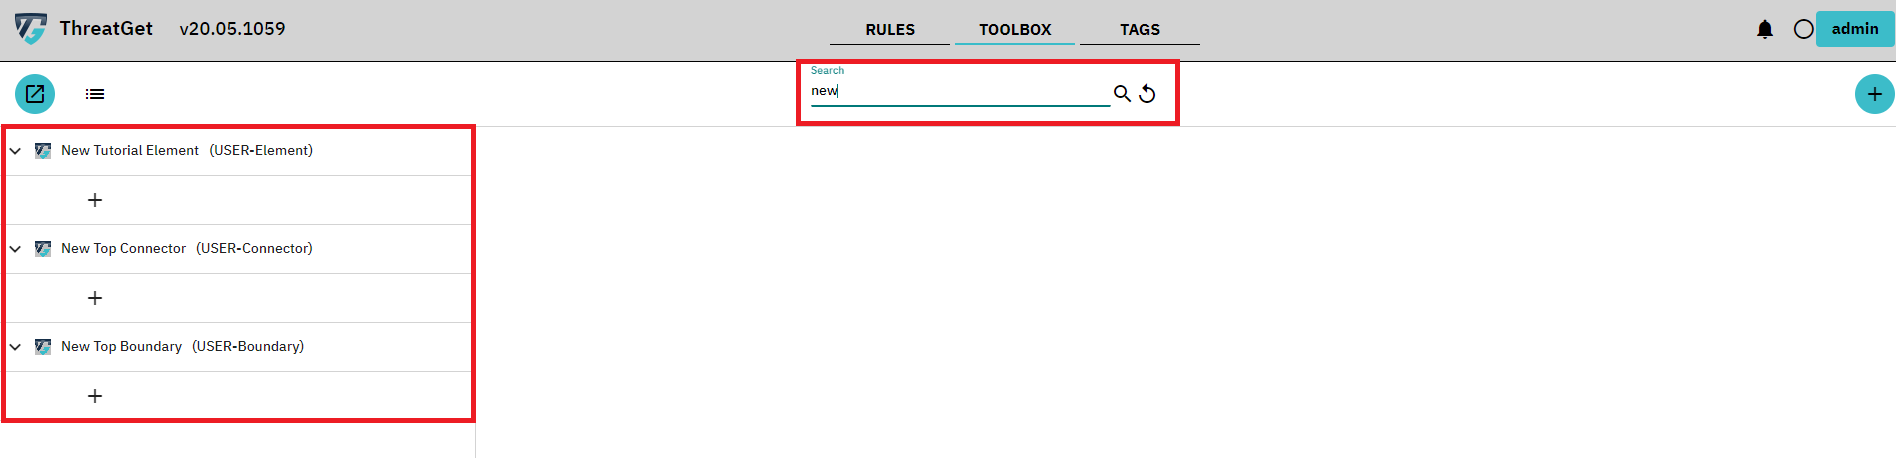
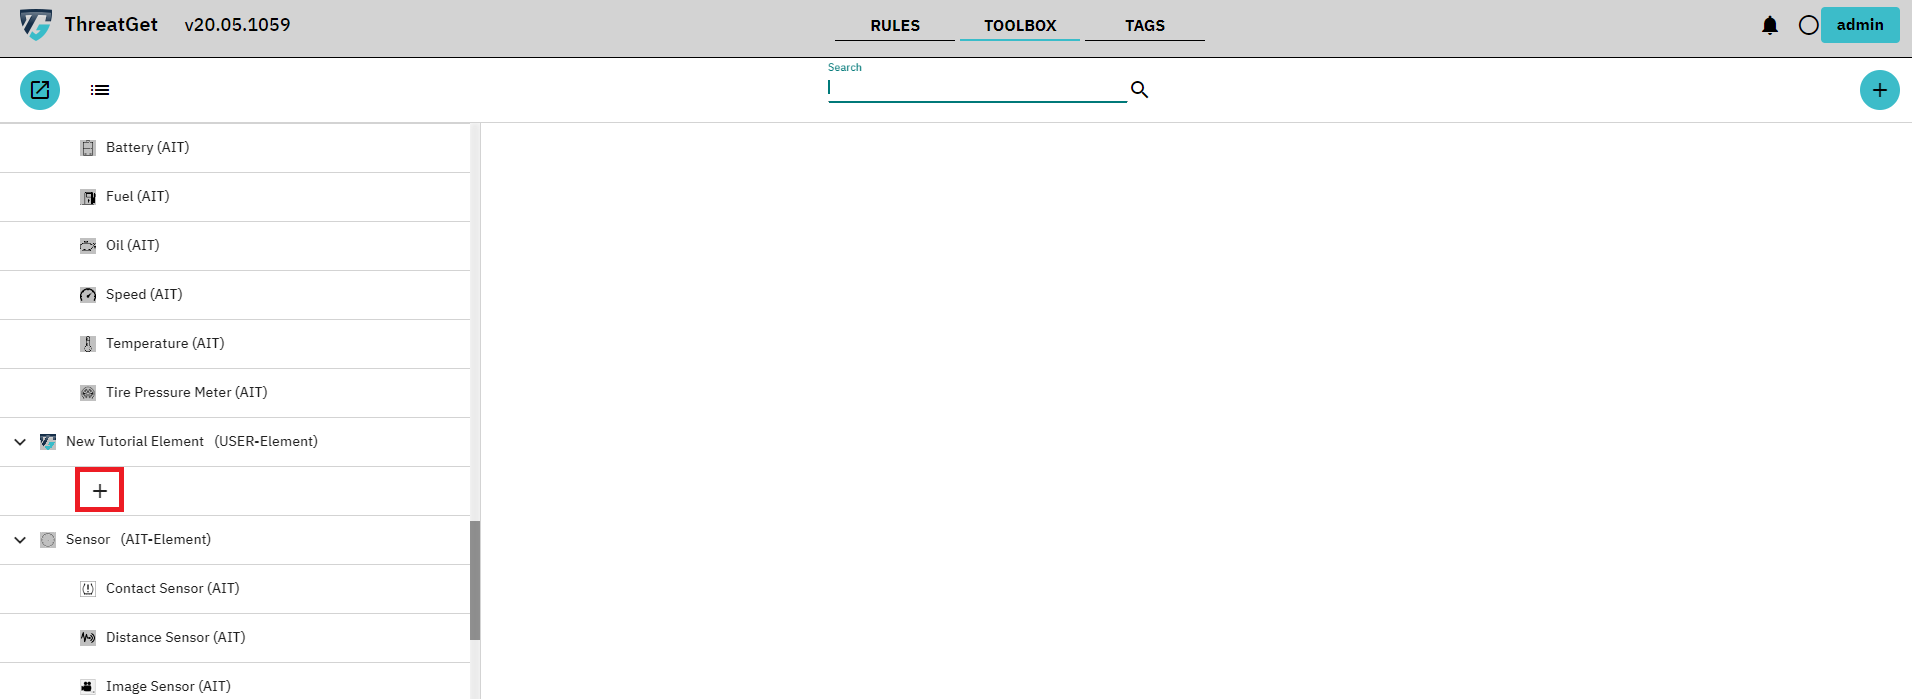
As you can see there is a + below the newly created element.
If you click on this Button you create a Sub Element.
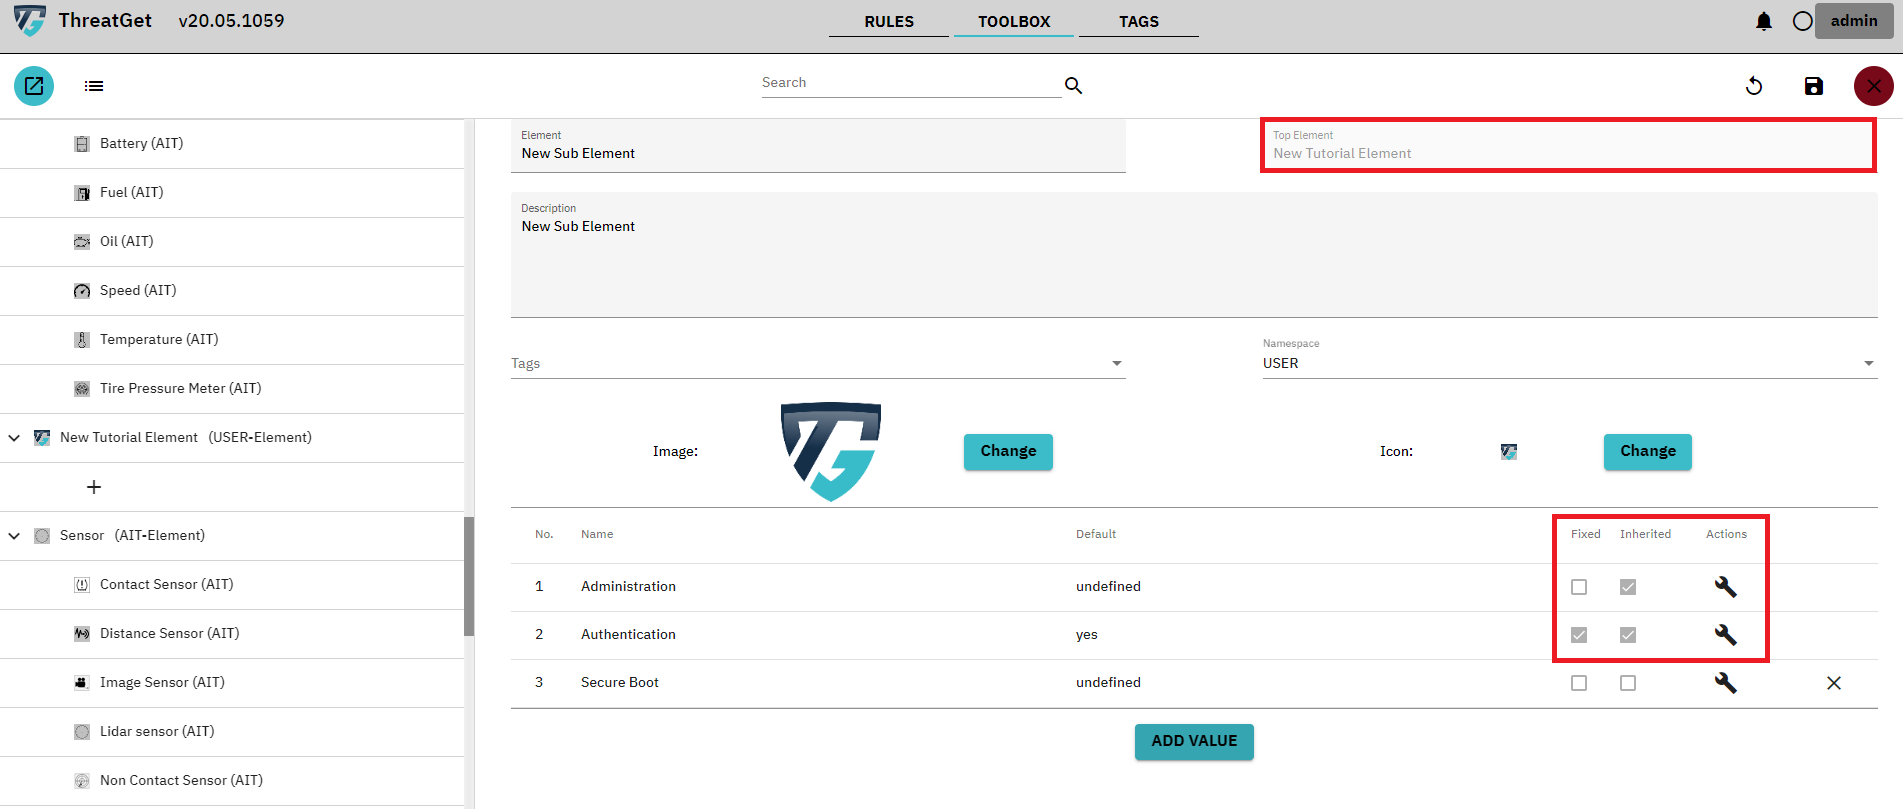
The view is almost the same as for the previously created element. Only now you can see what the Parent Element is. In this case, of course, the previously created element.
Furthermore Icon and Image have been adopted but can be changed if necessary. If you look at the Tagged Values, you can see which ones have been inherited from the Parent Element. Another Tagged Value has been added here to clarify the difference in the Inherited column.
Please mention that Inherited tagged values cannot be deleted and if a Tagged Value is inherited and Fixed it cannot be edited or deleted.
You can also add so called THREATGET Tags to your element. These tags are different from the Tagged Values. The purpose of the THREATGET Tags is to group Elements, Connectors and Boundaries.
To add a THREATGET Tag to an Element please click on the selectable Tags Input.
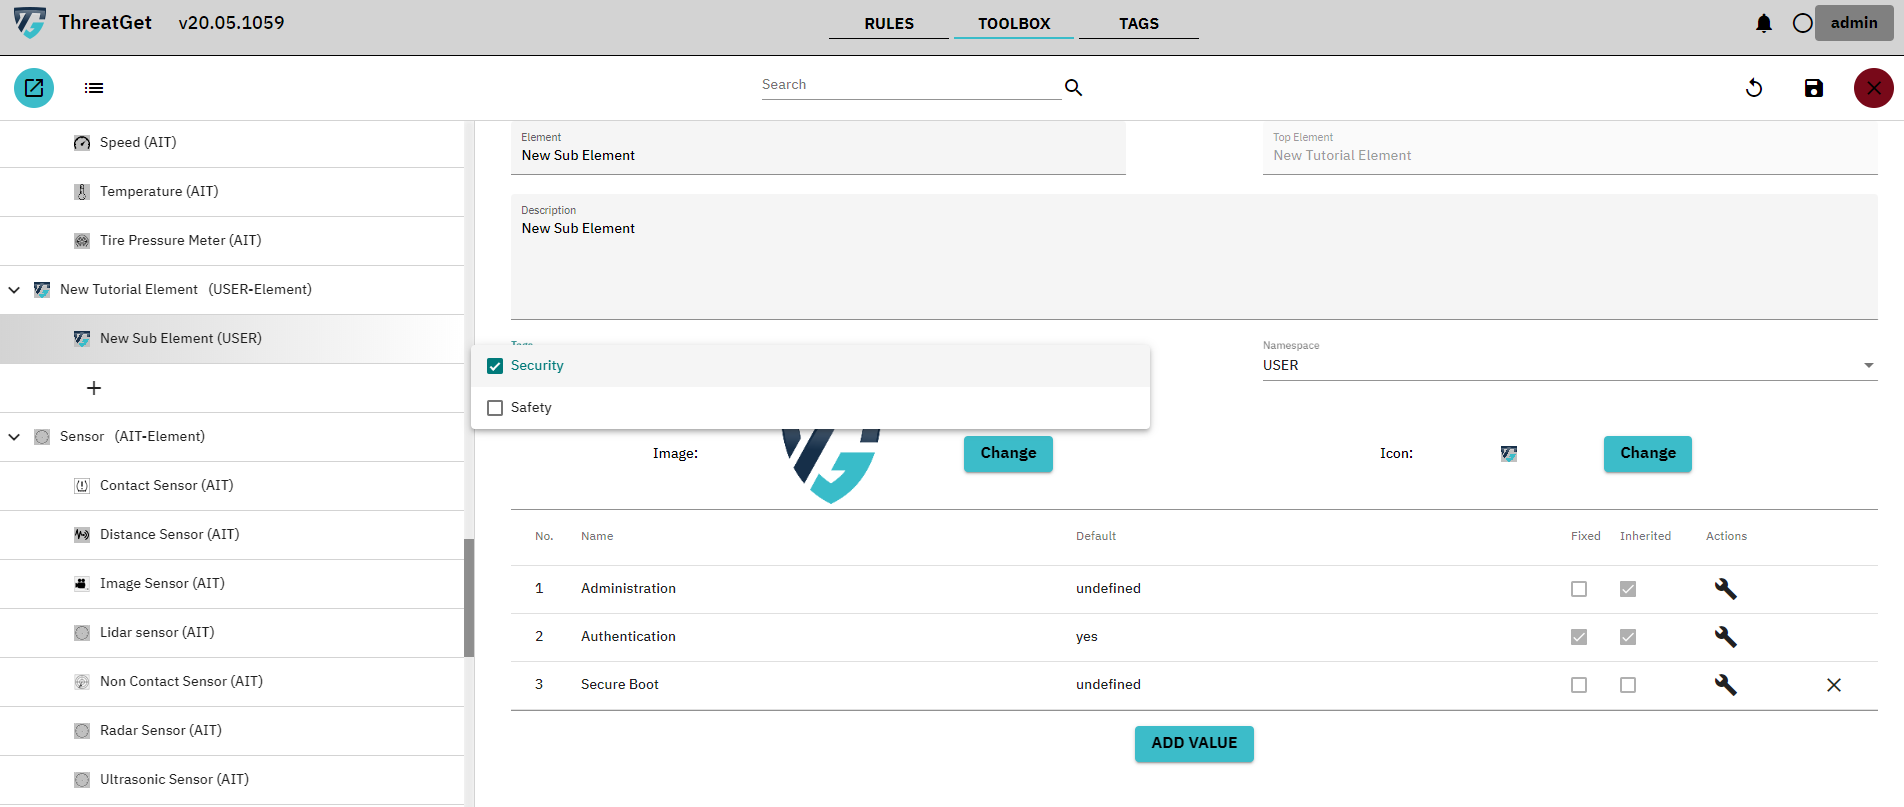
You can select as many predefined THREATGET Tags as you want.
To learn how to create new THREATGET Tags please see the documentation for tag creation
After you added enough tags you can disselect the selection and the tags are added to the element.
If you add THREATGET Tags to the Top-Element these tags get added to all the sub-elements.
Pleace once again click the button with the floppy disk in the top right corner to save this new Sub Element.
Create a Connector
Creating a Connector is mostly the same as creating an Element.
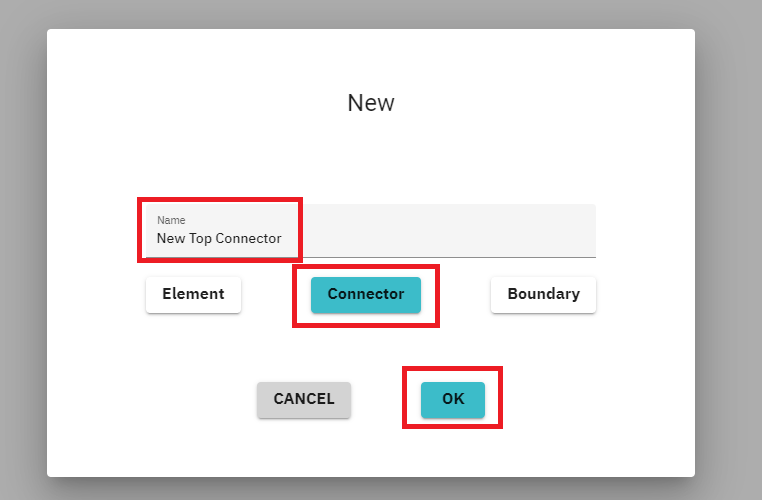
To create a new Top Level Connector click on the + Button in the right upper corner.
The dialog opens in which you can define a name and select the desired type. In this case, please click on Connector and then on OK in the lower right corner.
As you can see it is the same view as if you would create a new Element.
The only difference is that you don't have to define an Image. This is because a Connector is not displayed with an Image inside of the System Model.

From here on you can proceed as we did in the New Element Section.
Create a Boundary
Creating a Boundary is mostly the same as creating an Element or a Connector.
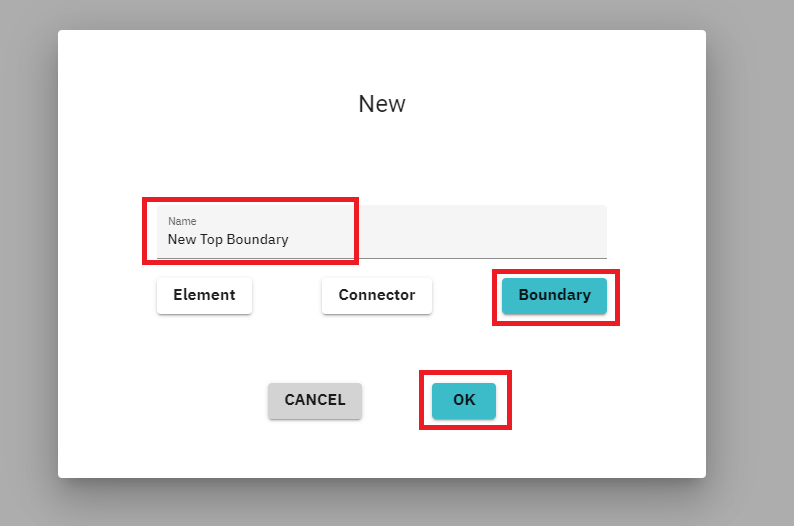
To create a new Top Level Boundary click on the + Button in the right upper corner.
The dialog opens in which you can define a name and select the desired type. In this case, please click on Boundary and then on OK in the lower right corner.
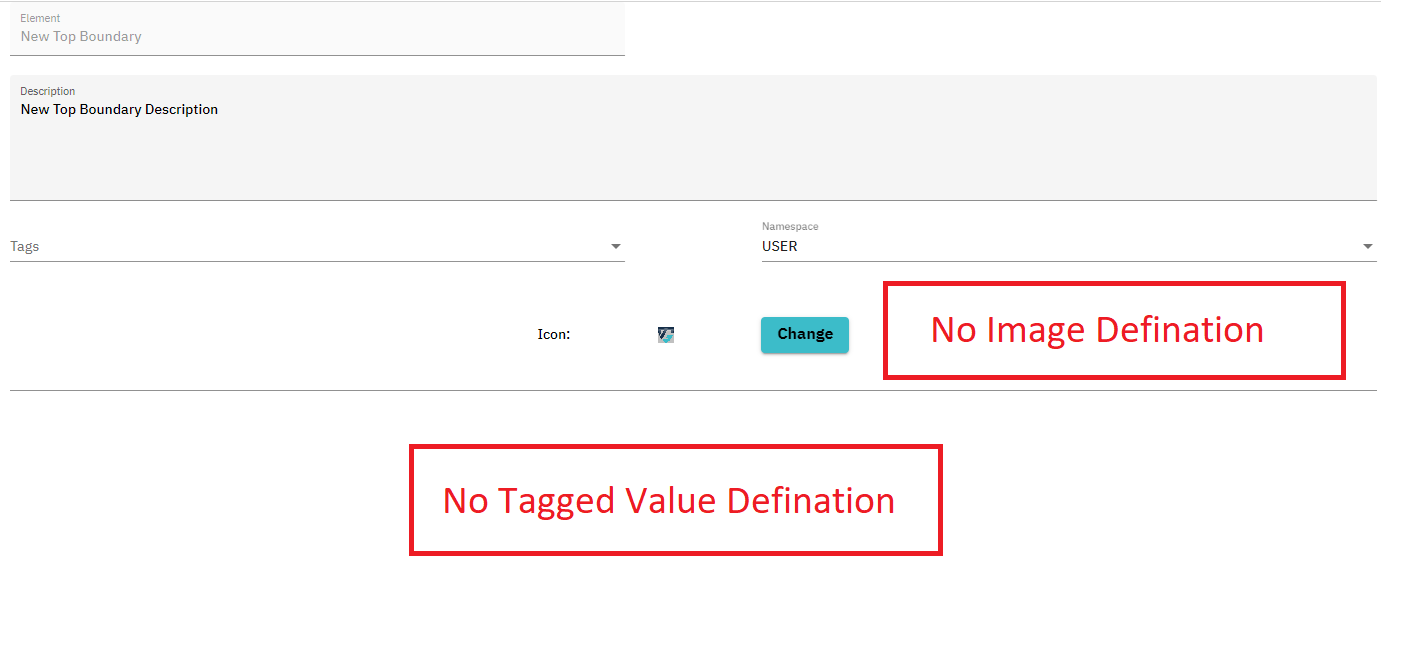
As you can see it is the view is now reduced compared to creating an Element or a Connector.
The differences are that you don't have to define an Image or Tagged Values. This is because a Boundary is not displayed with an Image inside of the System Model and has no Tagged Values.
From here on you can proceed as we did in the New Element Section.