Running the Analysis
Once the user has completed the modelling process, the next step is to determine how secure the model is and whether any security gaps require additional security concerns.
Threat Analysis
Right-click either on the package or the diagram itself in the Project Browser and then select Specialize ➺ ThreatGet➺ Threat Analysis. In our case, the package is called ThreatGet Example. Additionally, you can perform the threat analysis by selecting ThreatGet➺ Threat Analysis from the Specialize ribbon. It also possible that the user can right-click on the workspace then selecting Specialize➺ ThreatGet➺ Threat Analysis
Before initiating the threat analysis process, ThreatGet asks the user to select the tag(s) of rules that should be applied to the given model. Tag(s) are used to classify categories of rules as discussed in Managing Tags.
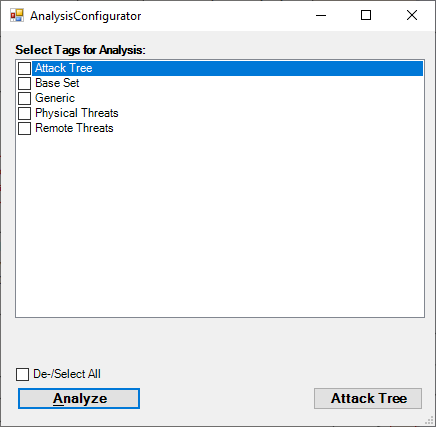
There are two options for performing a threat analysis process ( Analyze or Attack Tree). You can either choose Analyze option or the Attack Tree option.
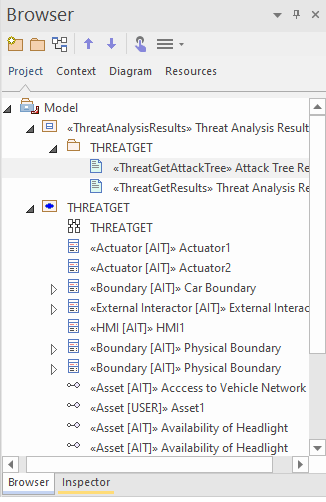
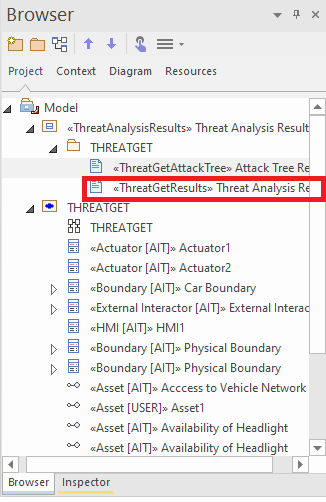
If you select any of these two options (i.e., Analyze or Attack Tree) threat analysis process will be started and generate threats. As shown below, all results will be created and stored within ThreatGet's diagram. The Analyze results will be described under Threat Analysis Result, where the Attack Tree results will be stored under Attack Tree Result
After the threat analysis, the following window will be displayed that confirms ThreatGet has completed the threat analysis process.
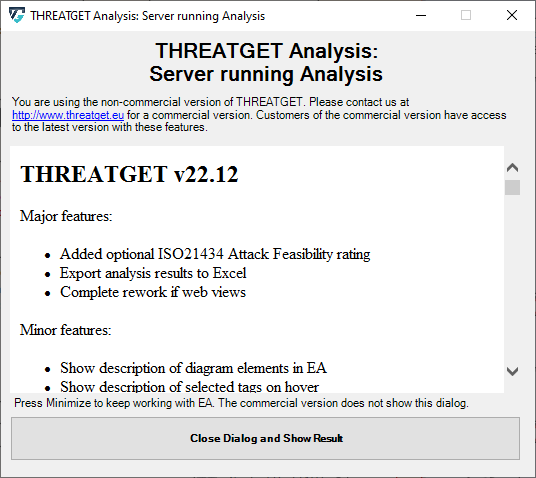
ThreatGet's UI (Analyze Option)
ThreatGet creates an interface that contains all identified potential threats and gives more information about each threat, such as its impact, likelihood, severity level, and more details about threats. The results will be automatically displayed (once pressing on Close Dialog and Show Result button as shown ThreatGet Running), or Double-click on the Threat Analysis Result, to open the results interface.
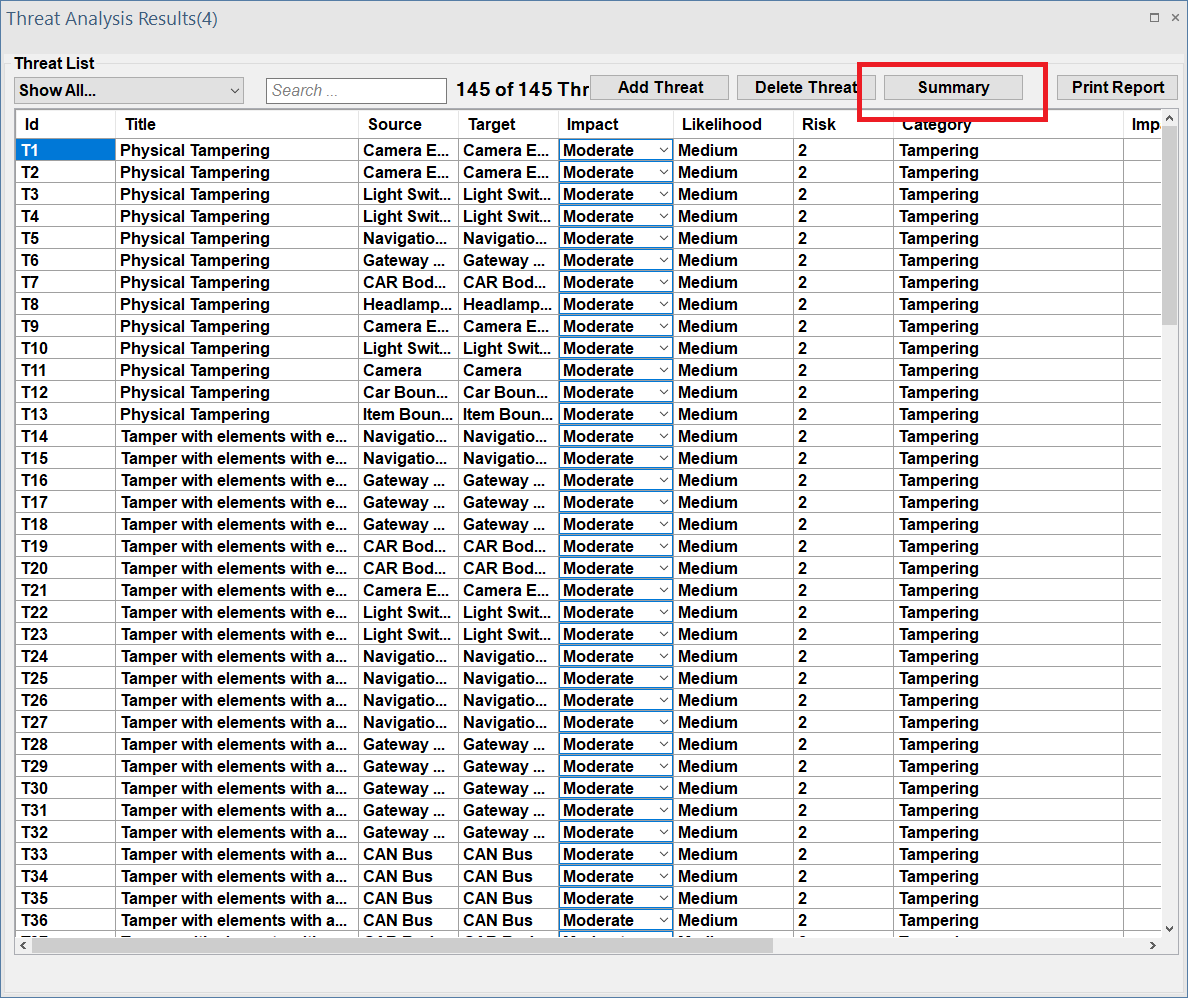
The interface will be displayed as follows, which contains a list of all identified threats.
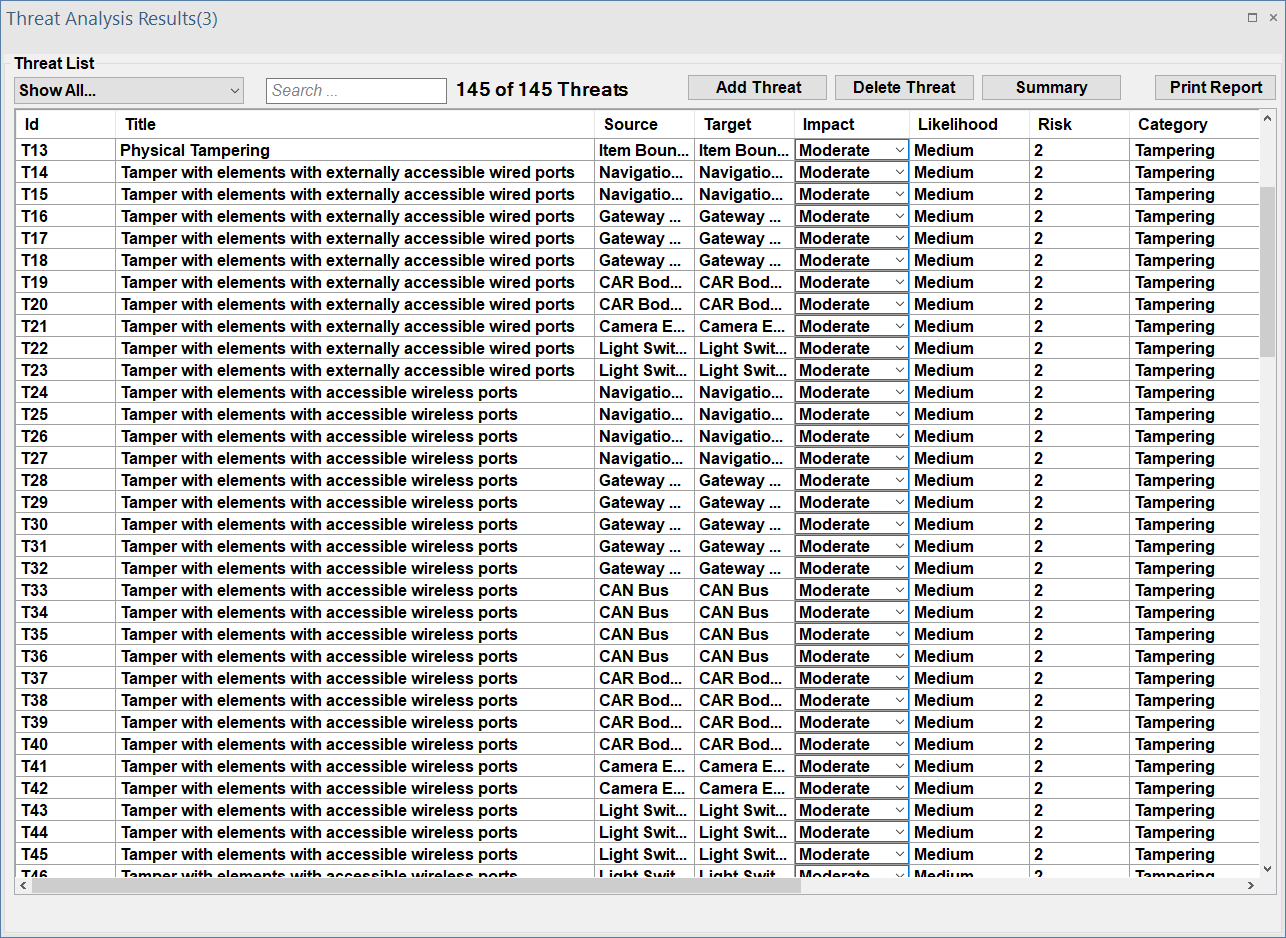
This list including the following infromation for each identified threat:
- Title: Name of the identified threat.
- Source: The affected source element
- Target: The affected target element
- Impact: The imapct level
- Negligible: equivalent to level-0
- Moderate: equivalent to level-1
- Major: equivalent to level-2
- Servere: equivalent to level-3
- Likelihood: The likelihood value
- Very Low: equivalent to level-0
- Low: equivalent to level-1
- Medium: equivalent to level-2
- High: equivalent to level-3
- Risk: The risk estimation based on the Impact and Likelihood values
- Category: Each threat is classified according to its malicious impact; ThreatGet uses the STRIDE model to describe the category of all identified threats:
- S – Spoofing: violates authentication
- T – Tampering: violates integrity
- R – Repudiation: violates non-repudiation
- I – Information Disclosure: violates confidentiality
- D – Denial of Service: violates availability
- E – Elevation of Privilege: violates authorization
ThreatGet offers a visual representation of all impacted elements within the system model. To see that, double-click on any threats in the list.
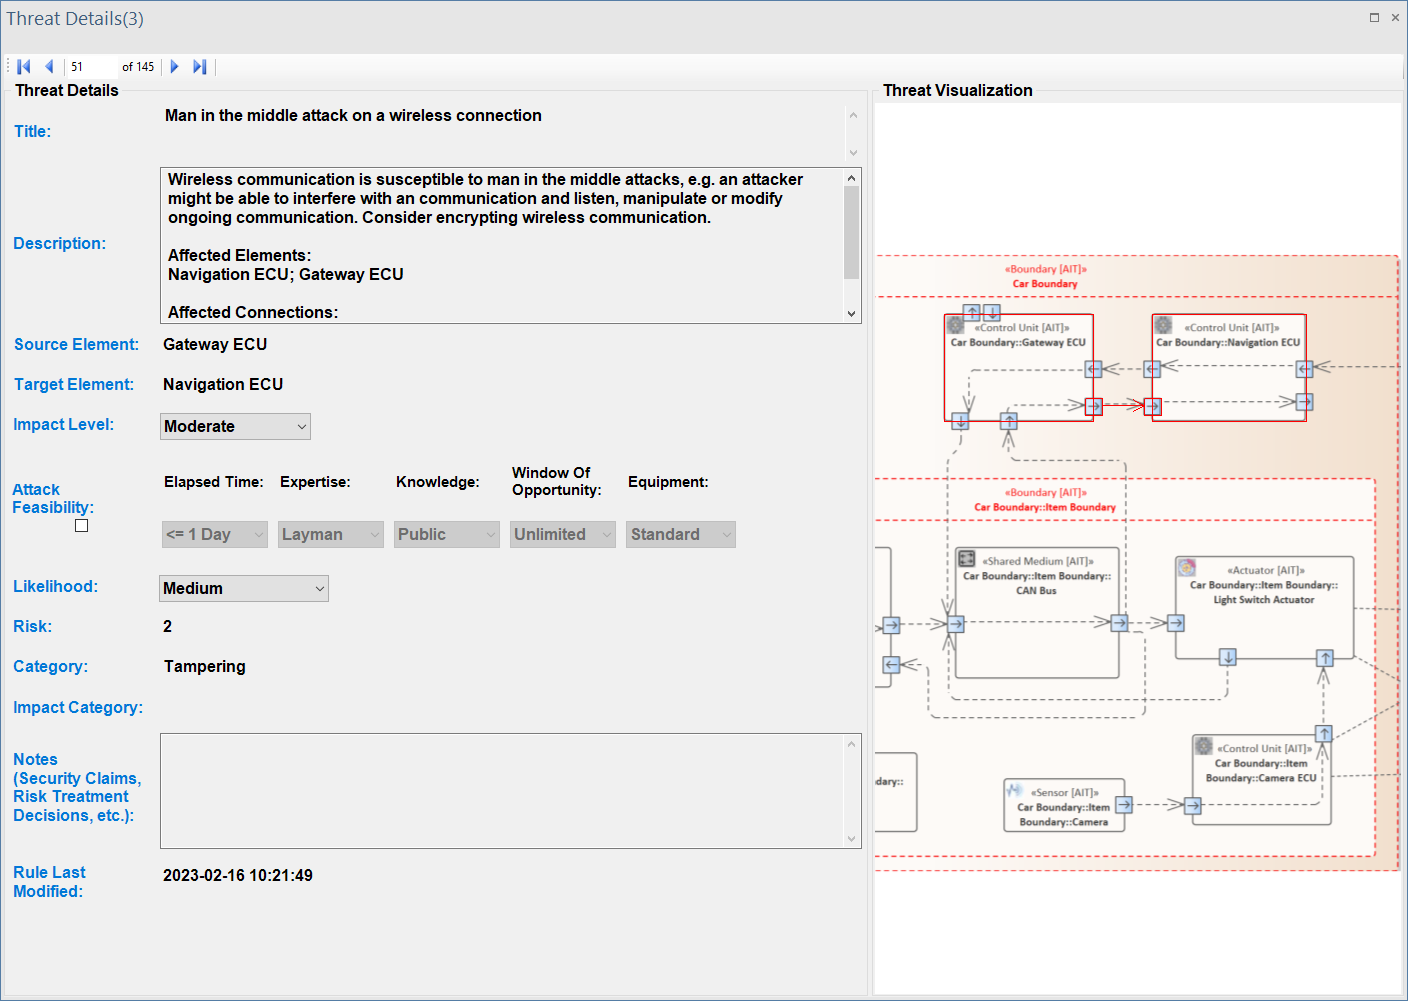
ThreatGet visualizes all affected elements and their connections, as illustrated on the following interface. The interface also displays threat details, such as the title, description, impacted source and target elements, impact and likelihood values, risk assessment, and STRIDE categories. The Description field offers further information about the threat and elaborates on the particular elements and connections that have been impacted by the selected threat.
Summary Interface
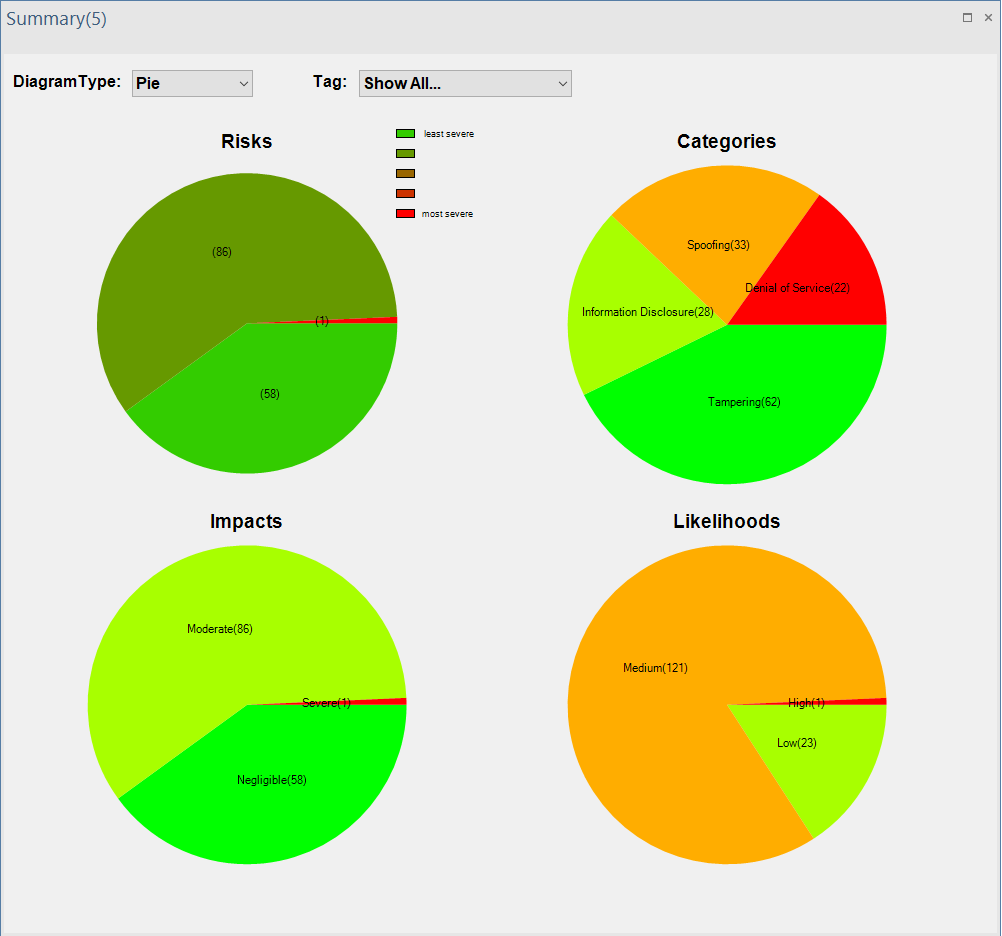
ThreatGet provides a complete summary of all identified threats, including risk evaluation and categories of the STRIDE classification.
Once clicking the Summary button, a window will appear, presenting further information about the impact, likelihood, overall risk estimation, and the categories of all identified threats based on the STRIDE model.
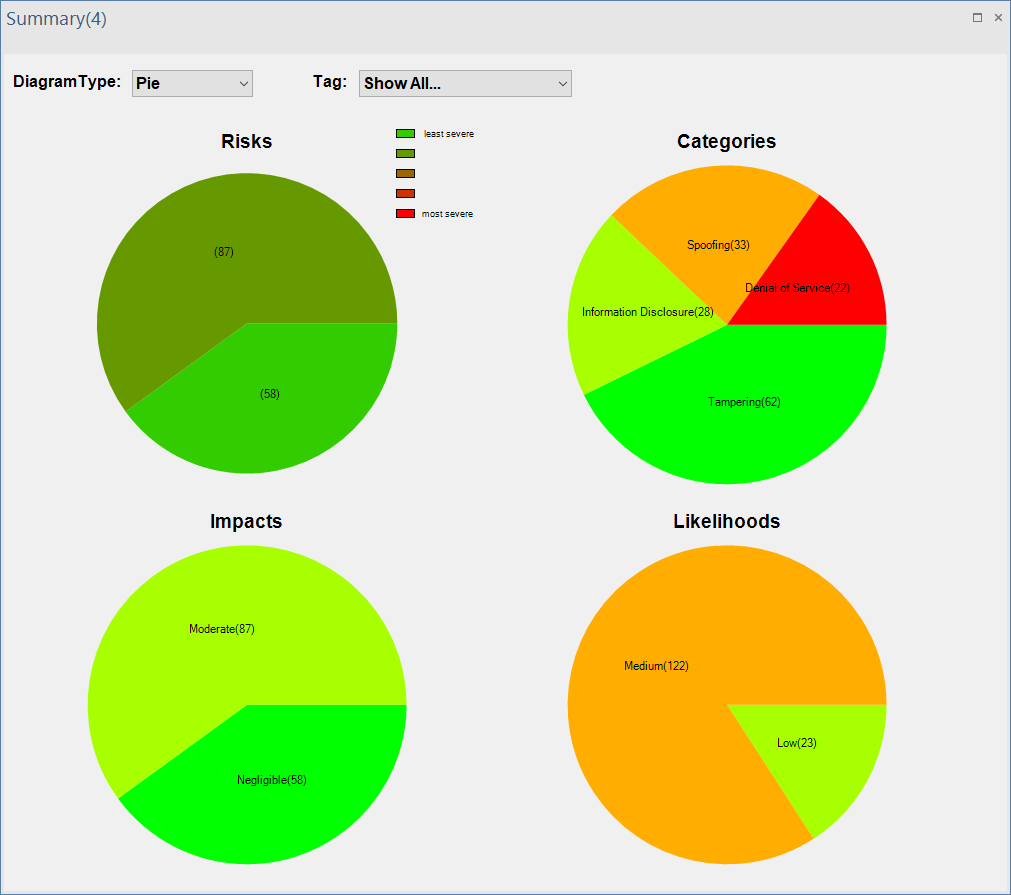
Users can change the data representation of the above charts according to what is preferred. The Diagram Type allows users to describe data in Bar, Column, Pie, and Doughnut charts.
Risk Evaluation
Each threat is annotated with two parameters: Impact and Likelihood, that describe the severity level of each threat. Users can adapt these parameters to describe the real risk of the identified threat, as shown below.
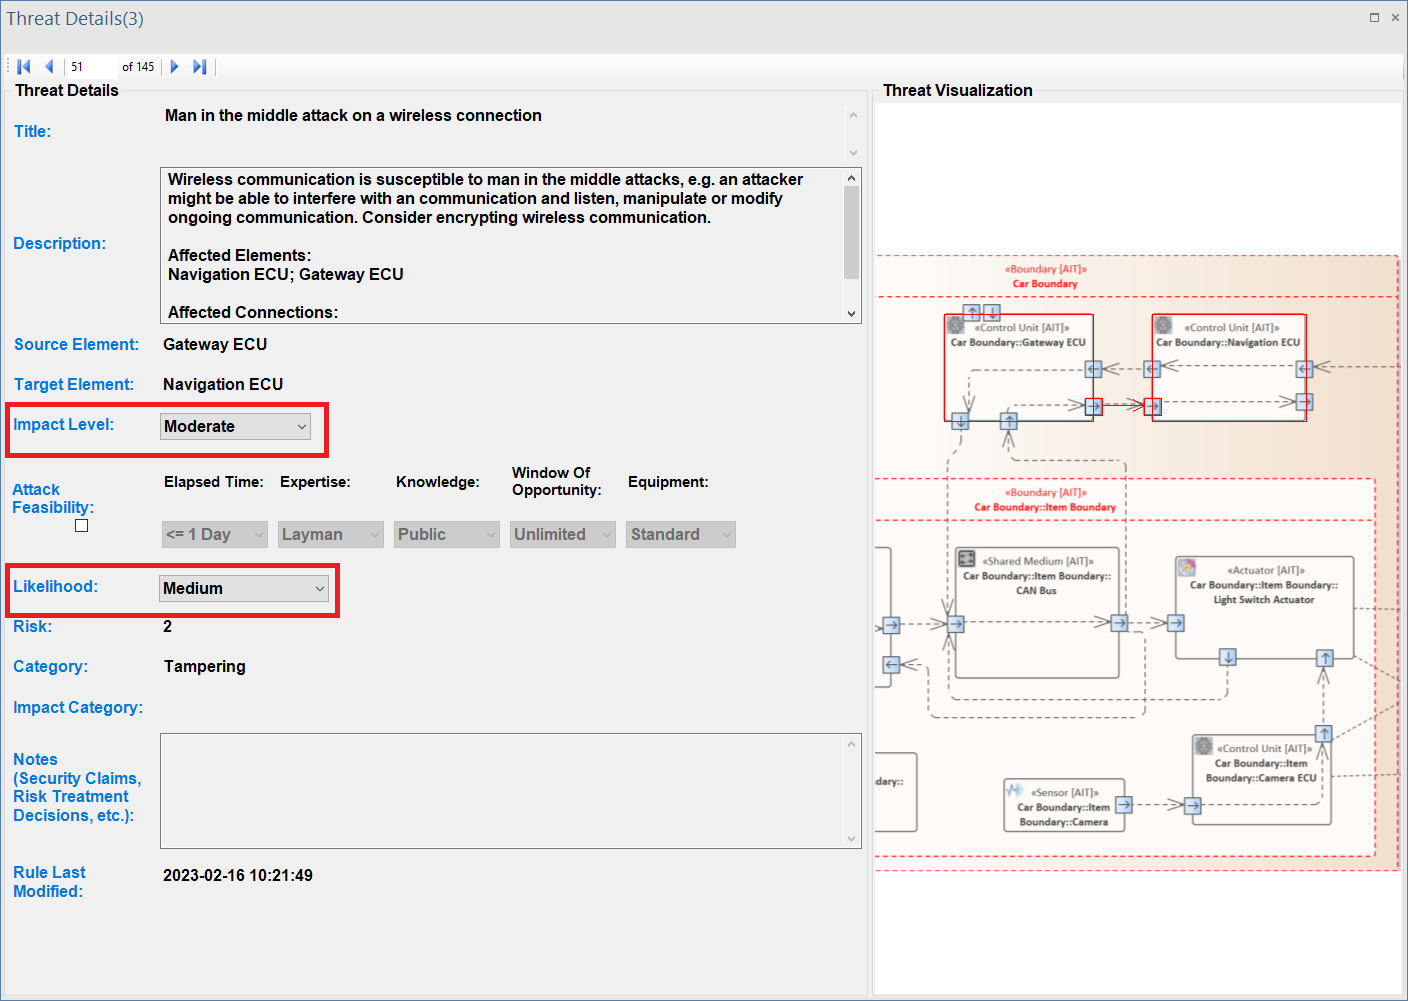
These parameters are used to determine the threat's risk severity level. Then, the overall risk level is estimated based on the previous calculation of each threat's severity individually. ThreatGet allows the user to customize risk levels of the risk evaluation process. These values can be modified on the ThreatGet server as discussed in Risk Matrix.
Furthermore, users can adjust these values for any threats listed in the UI by selecting newly adapted values from drop-down menus, as descrbed in ThreatGet Details. The change immediately affects the severity level.
It further affects the over risk evaluation chart in the Summary interface.
Adding Notes
It is also possible to enter notes about the analysis. This makes it possible to save some information for later use. This information can be entered in the all-threat list interface, as shown below.
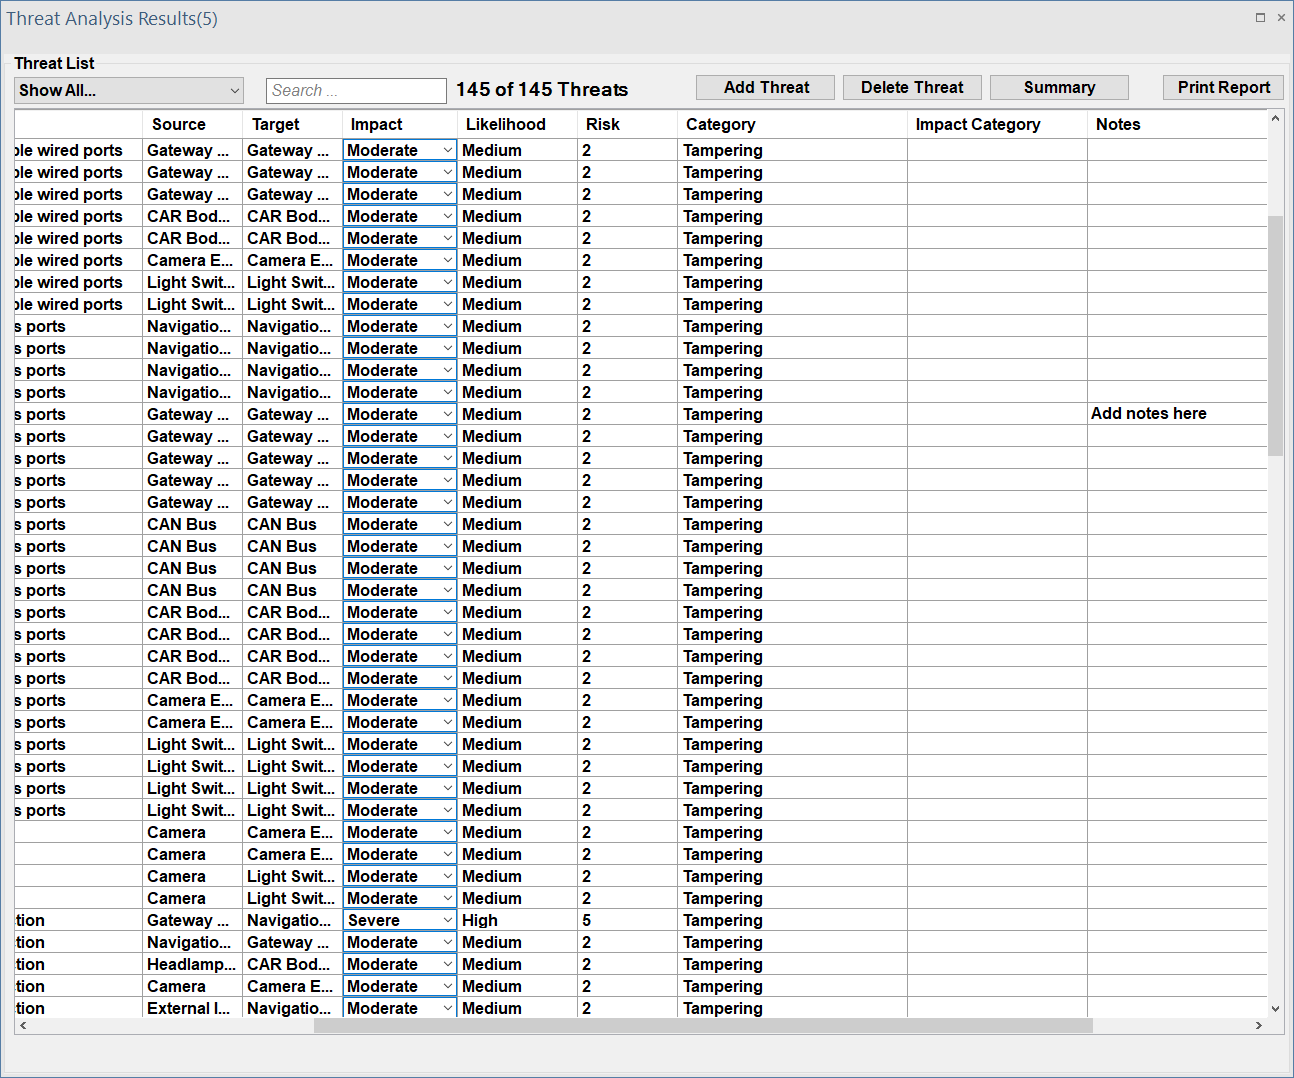
With each threat, the user can write comments in order to provide a more informative threat description; but only the first line of the user's note will be displayed at the note column in the table.
Find Data
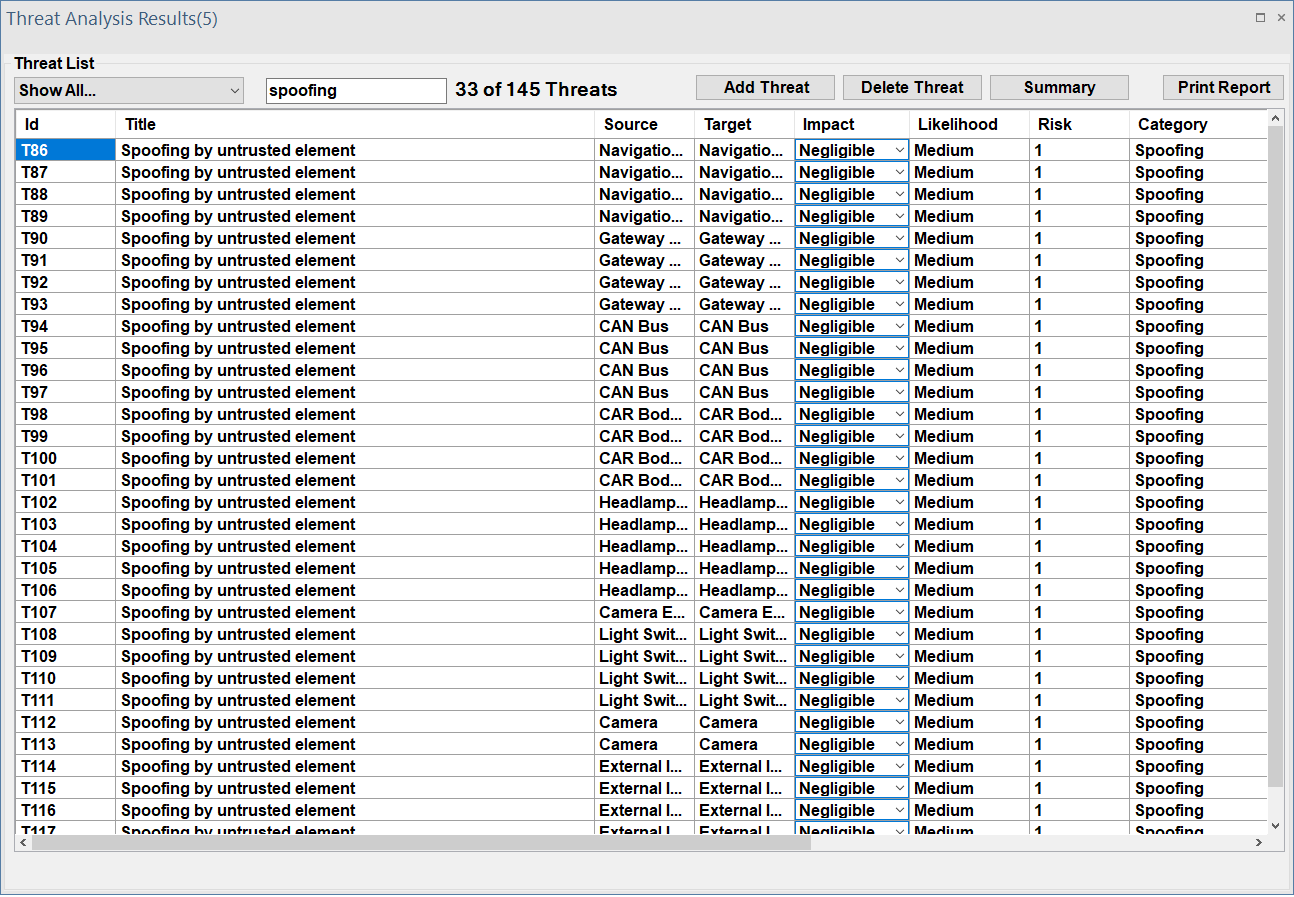
You can also use the ThreatGet search function to search through outcomes easily. The user's input is then used to filter the threat table.
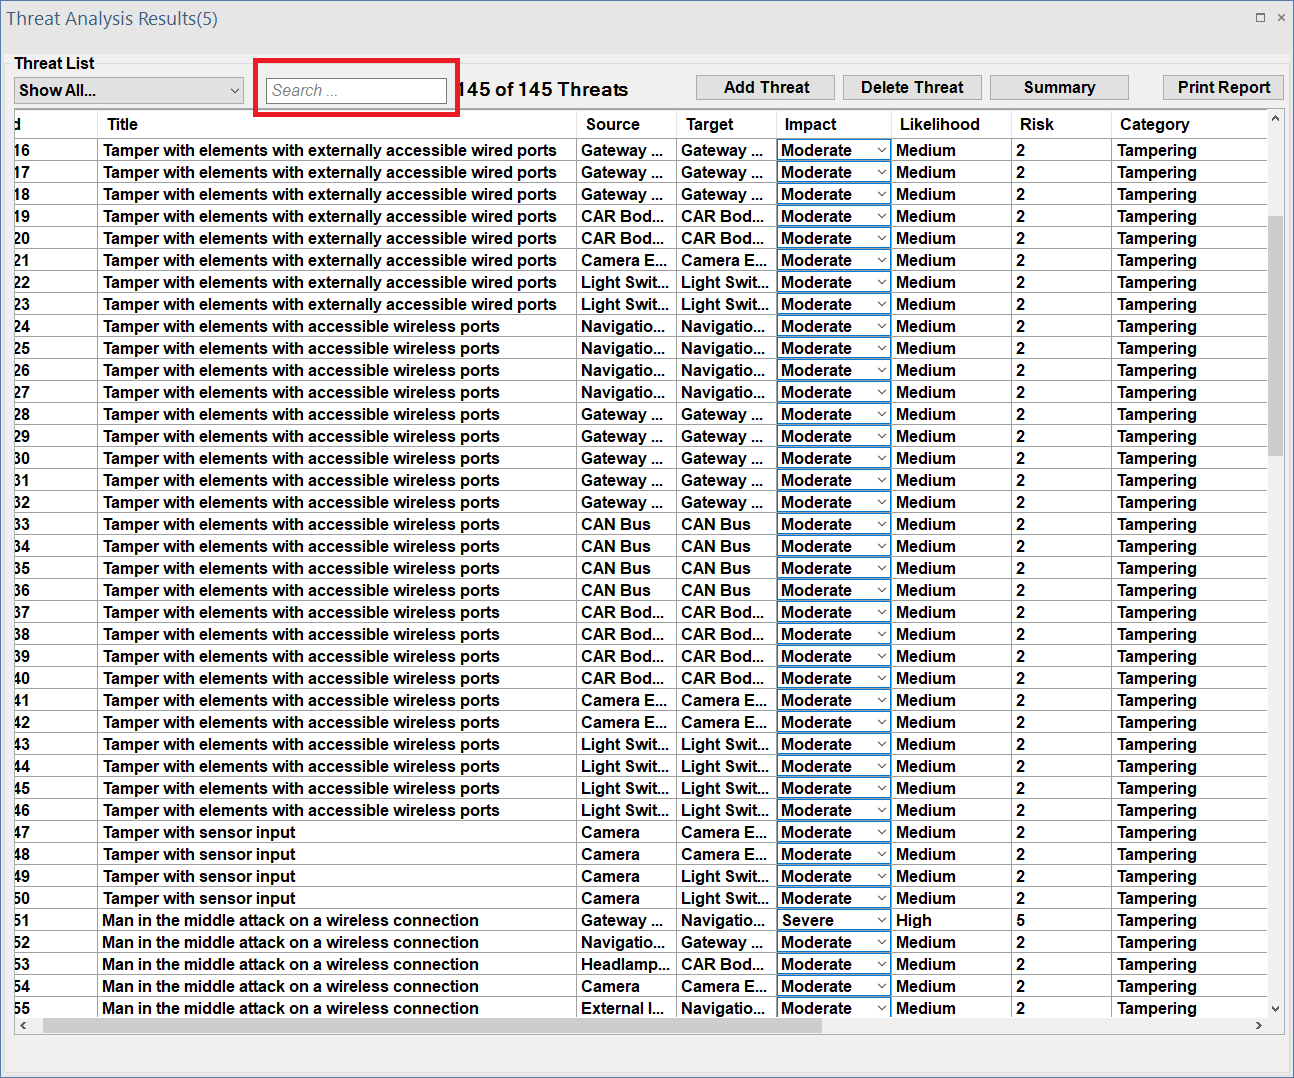
The searching function filters the obtained outcomes (i.e., title, category, impact, likelihood, description, and notes of each threat) based on the user's input.
For example, if you type "spoofing" in the search bar, ThreatGet displays the threats that are classified as "spoofing" category.
Adding or Deleting Threats
ThreatGet's interface offers that capability, allowing users to add new threats not found in ThreatGet's database.
Adding Threats
The user can click on Add Threat and then input all the required information.
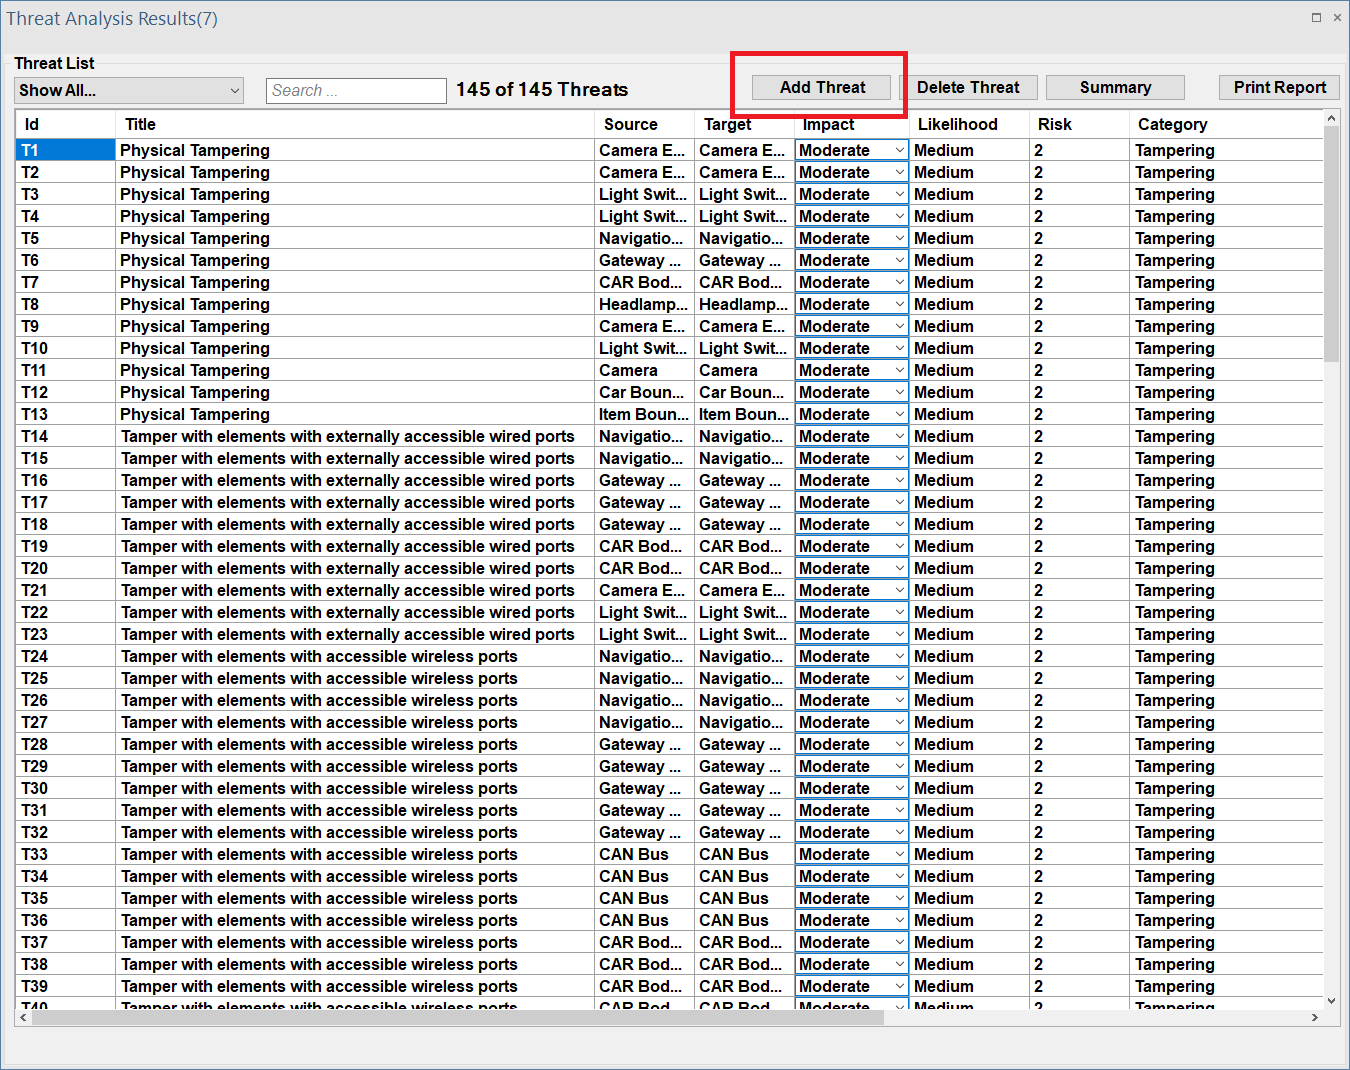
The following window will be displayed, asking users to input information about the new threat. Once the user enters all required information, he/she can save their inputs to generate a new threat.
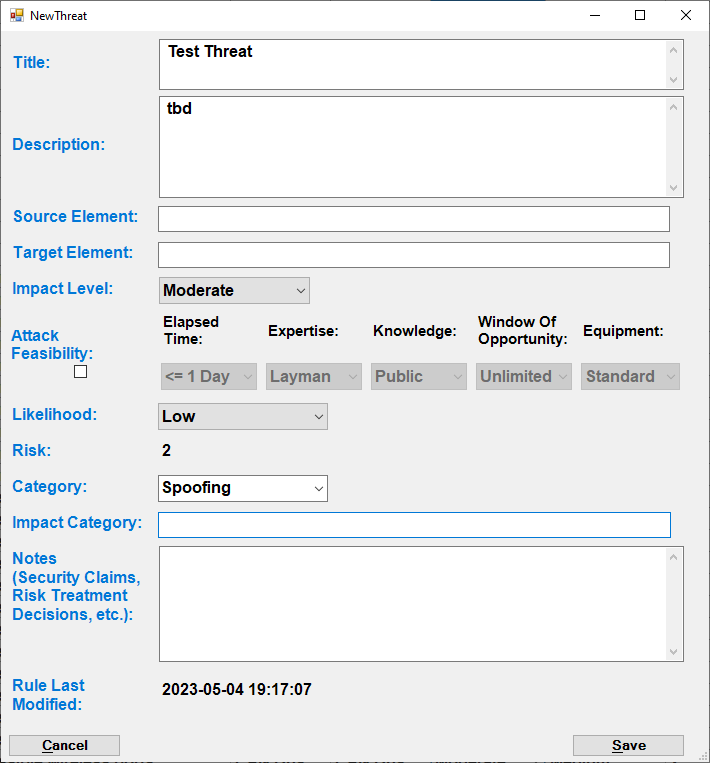
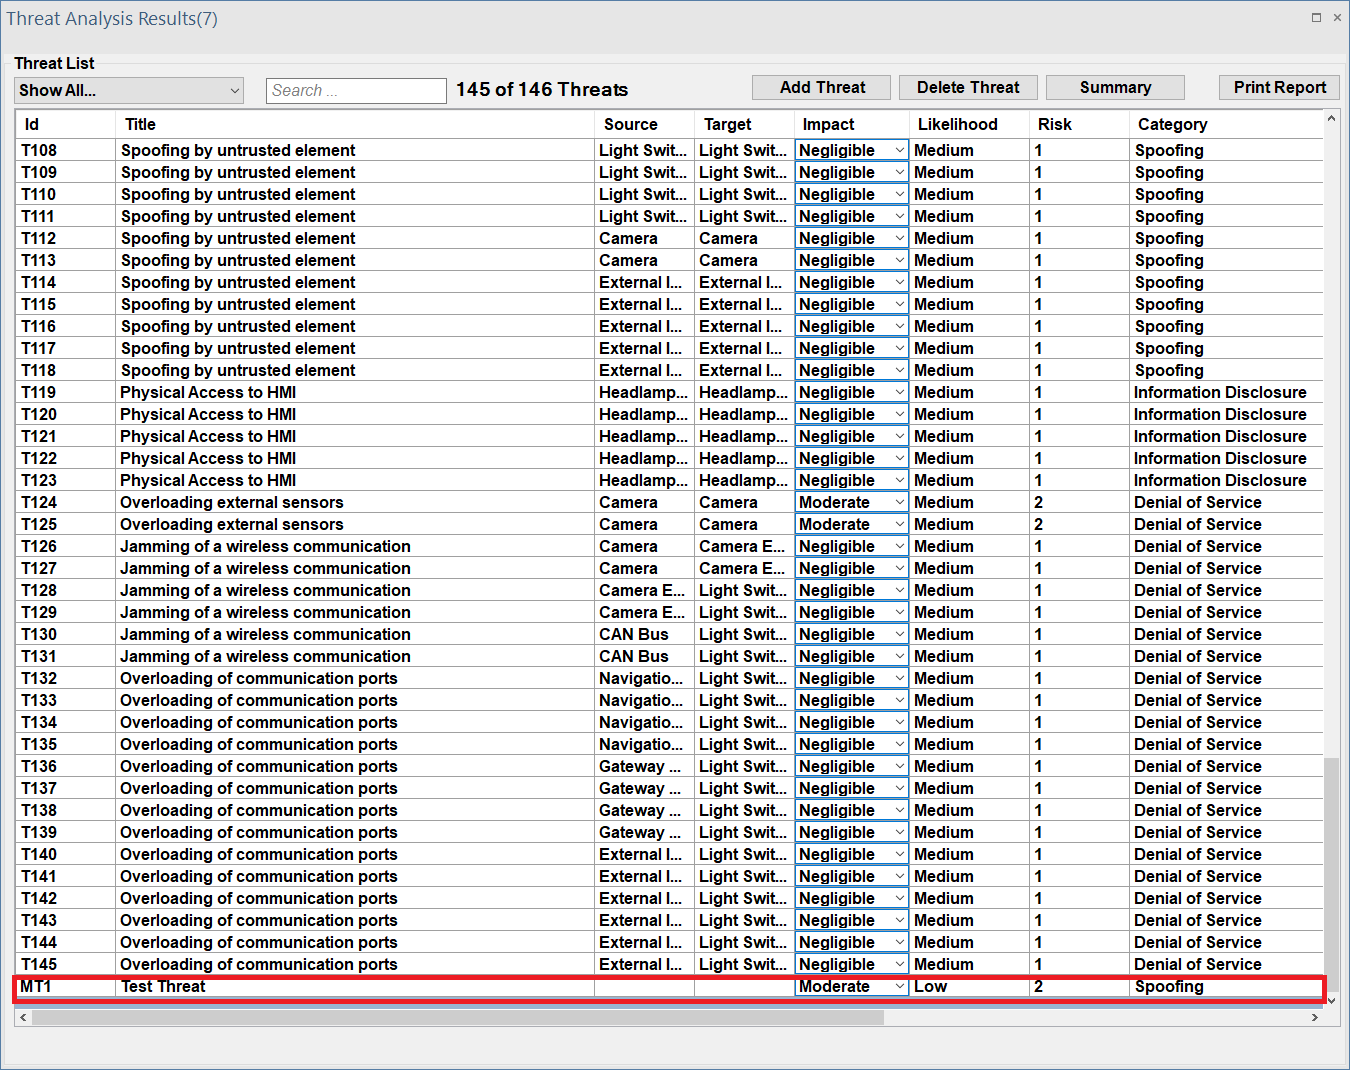
The new create threat "Test Threat" is created and stored as a part of all previously identified threats.
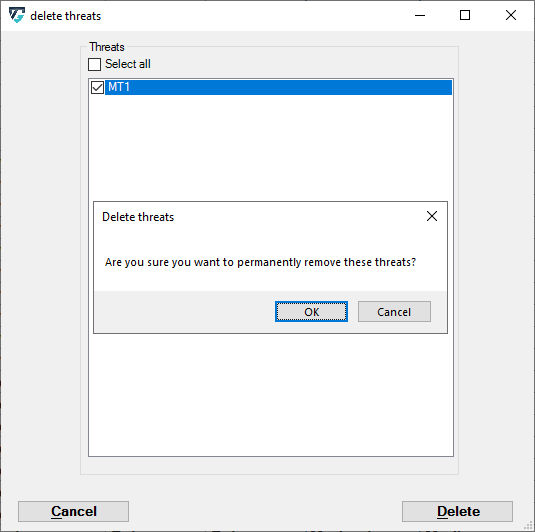
Deleting Threats
The user can select Delete Threat, which will bring up a window displaying all threats created by the user.
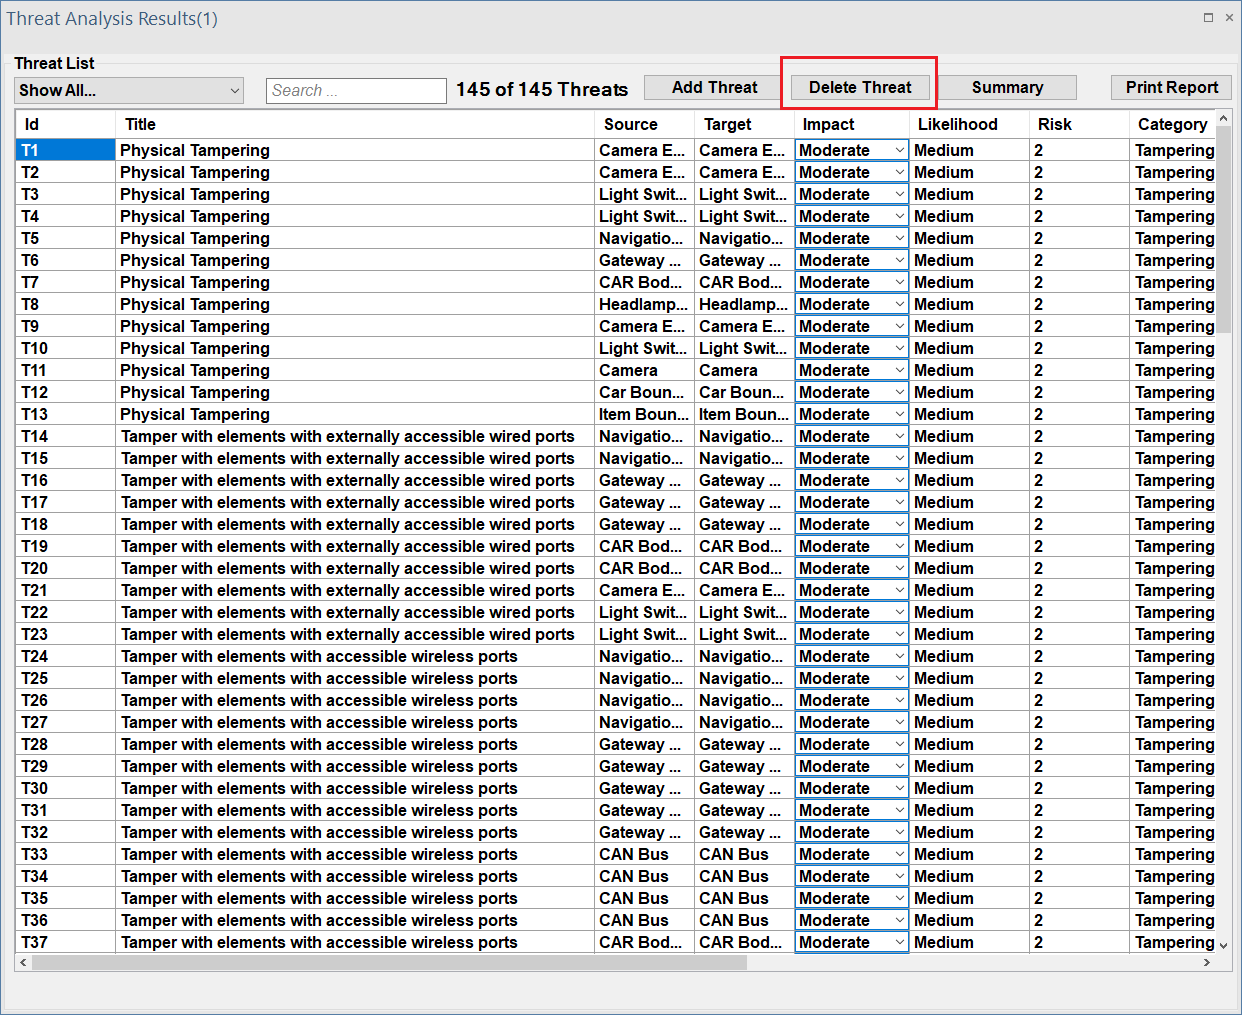
After choosing the threat(s) to be removed, the user can confirm their selection, and ThreatGet will delete the selected threat(s) from the list.
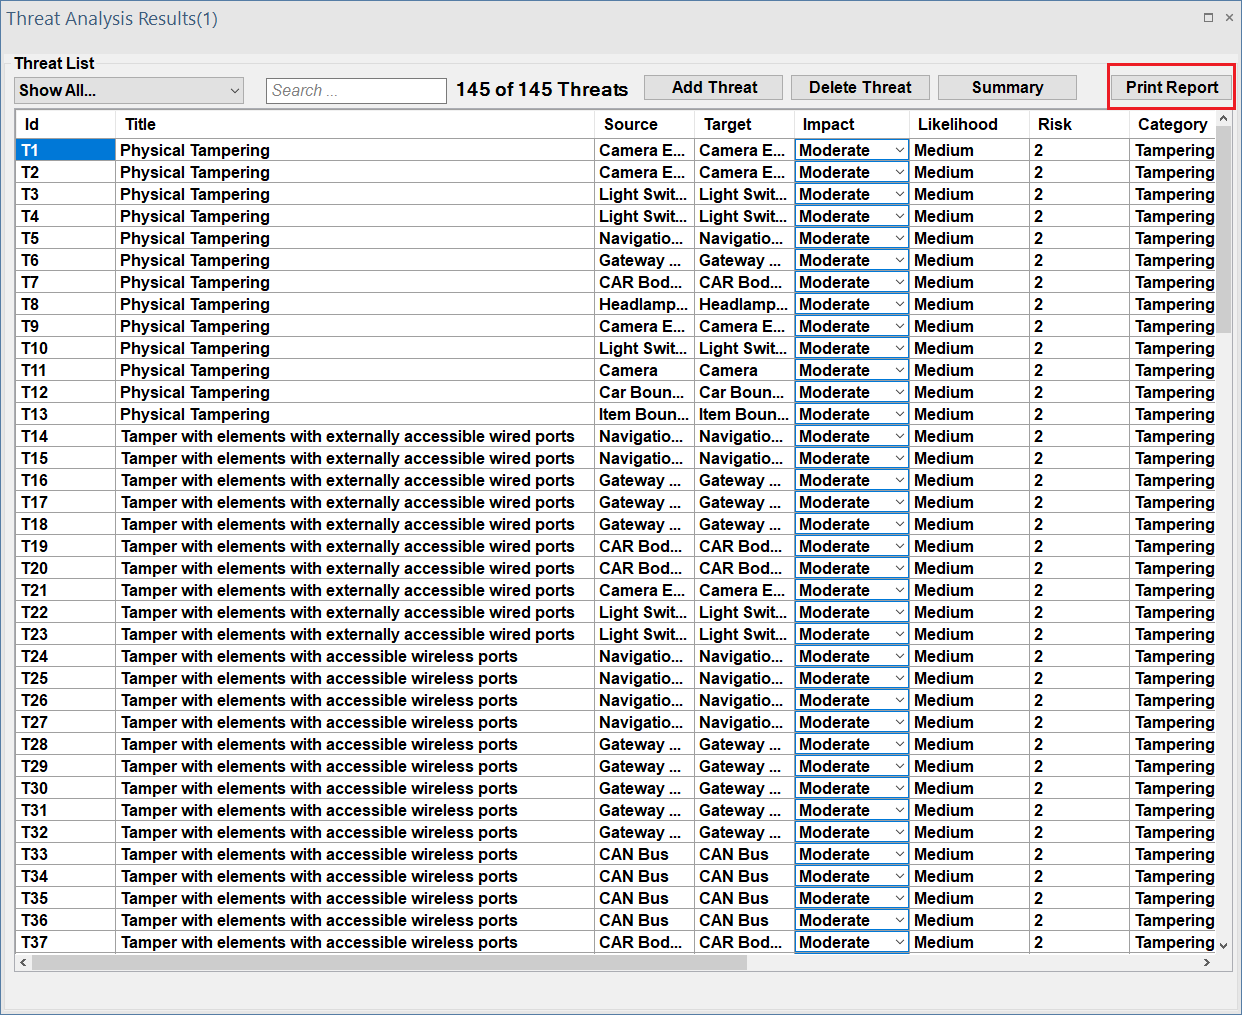
Documenting Results
Finally we can print a report of the generated threats.
ThreatGet's UI (Attack Tree Option)
ThreatGet offers an attack tree analysis that systematically arranges and illustrates how an attacker can accomplish their objective by targeting specific components. ThreatGet describes one threat or combines multiple ones to outline a comprehensive attack path, a potential path that an attack can follow to carry out a determinated threat scenario. The results will be automatically displayed (once pressing on Close Dialog and Show Result button as shown in ThreatGet Running), or Double-click on the Attack Tree Result, to show the generated attack tree.

Then the following interface will be displayed.
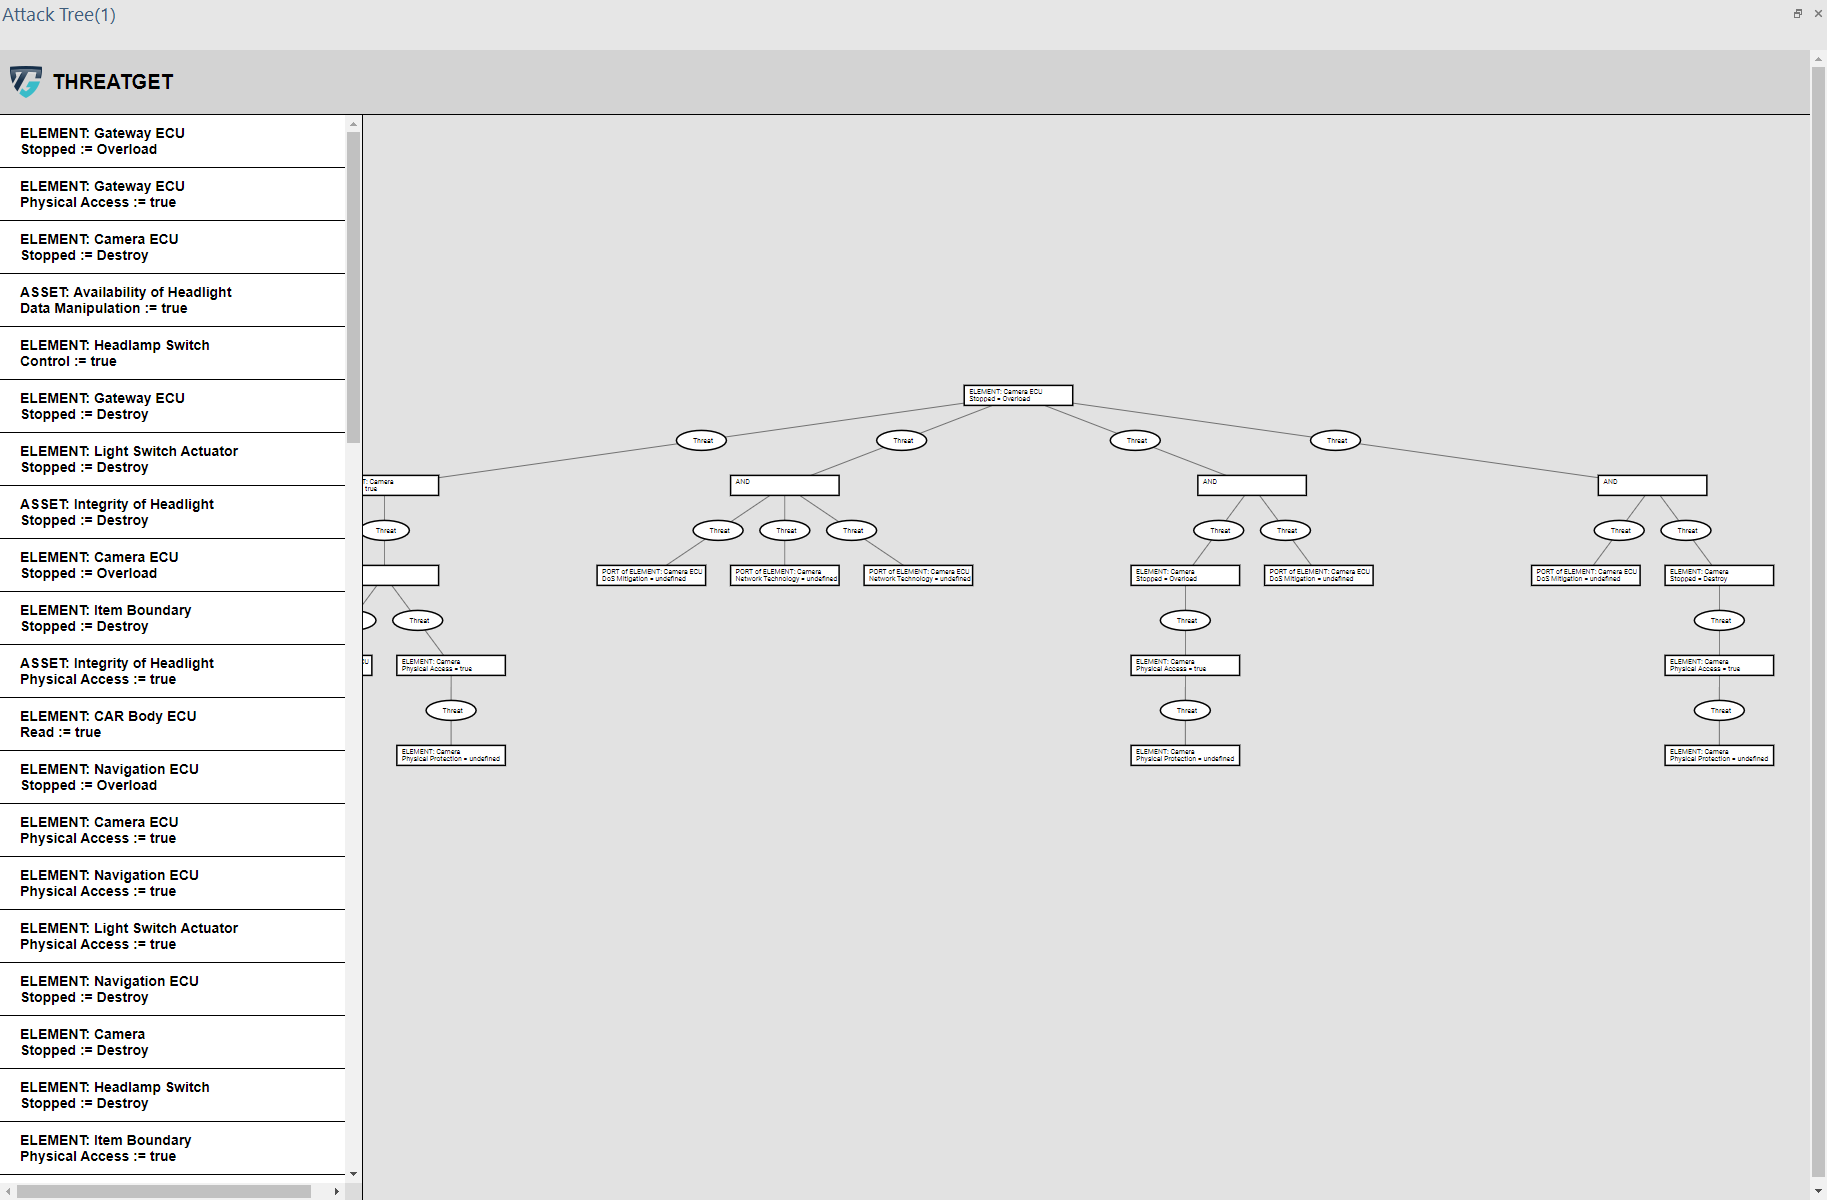
Users can choose a specific target (i.e., Element) from the left-hand side panel. Then ThreatGet will visualize the potential threats related to that target (i.e., element), illustrating the malicious paths an attacker might follow to achieve a particular malicious objective.
Users can explore the entire generated tree by using their mouse to scroll up or down, which allows for zooming in and out, respectively.
ThreatGet includes a feature enabling users to investigate more information about any threat. By selecting a specific threat, ThreatGet displays additional details such as the title, description, STRIDE category, likelihood and impact values, and threat expression for the chosen threat.